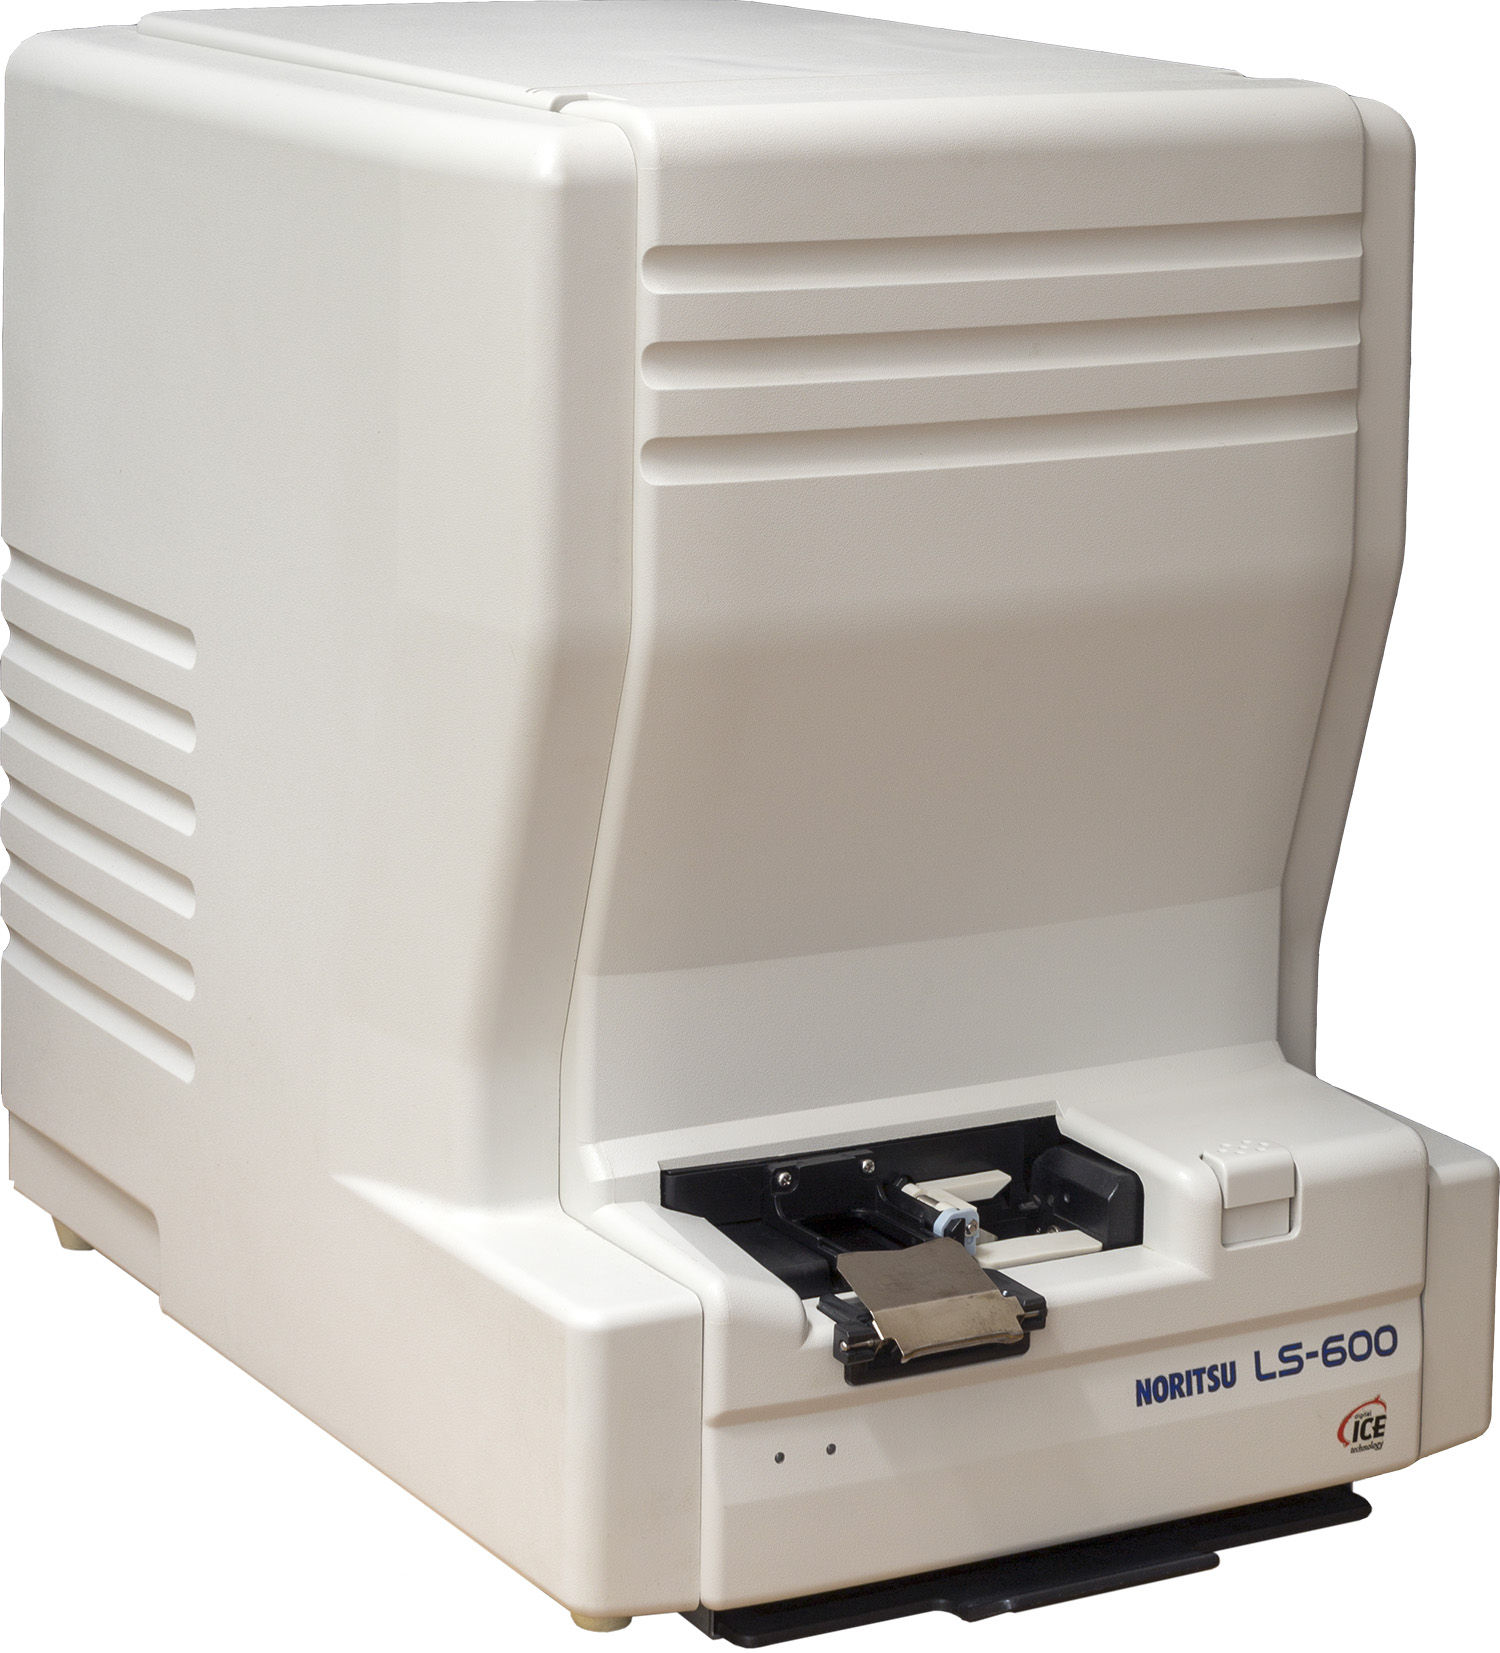
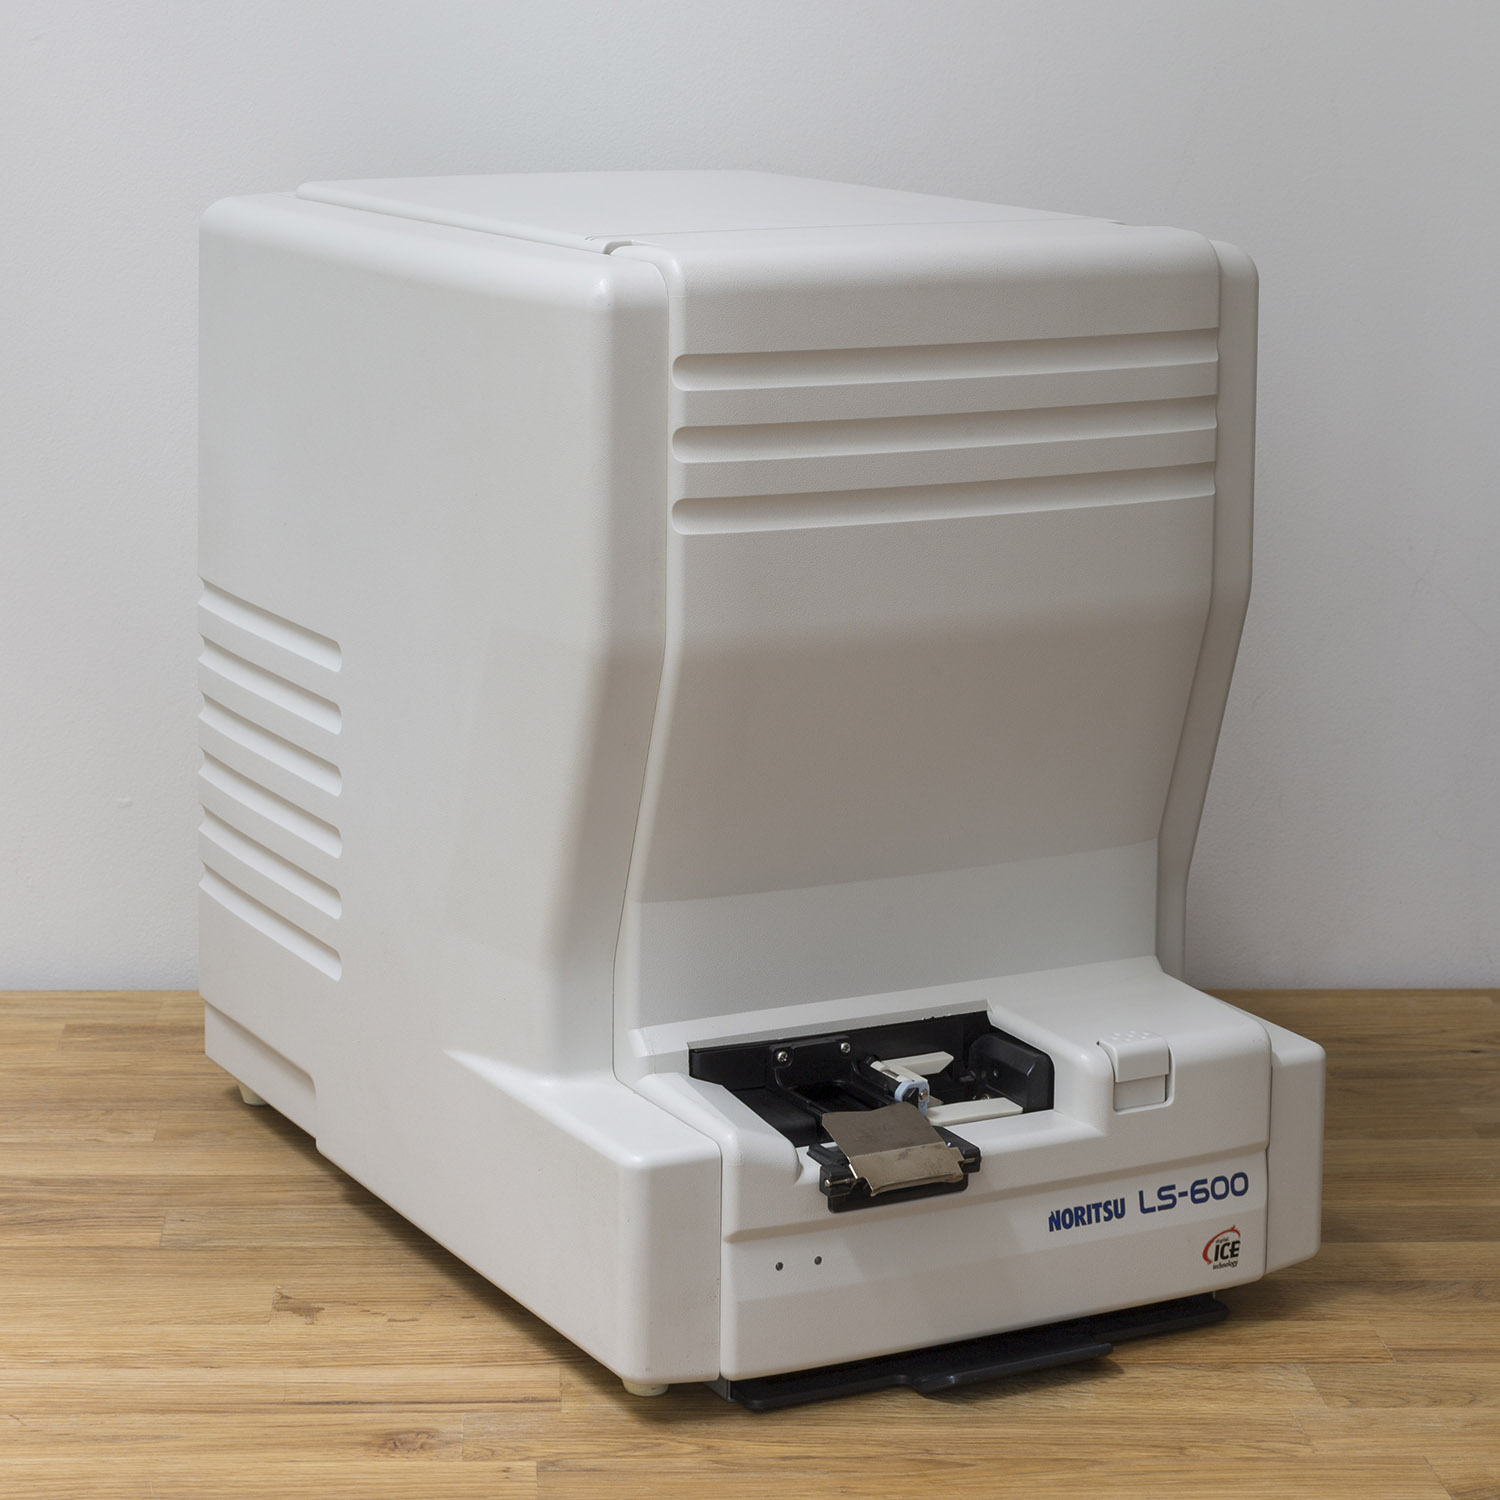
The Noritsu LS-600 is a 35mm film scanner designed for use in minilabs. Today, many photographers use it as a standalone scanner.
This article reviews the LS-600 in depth and provides detailed instructions for putting it to work!
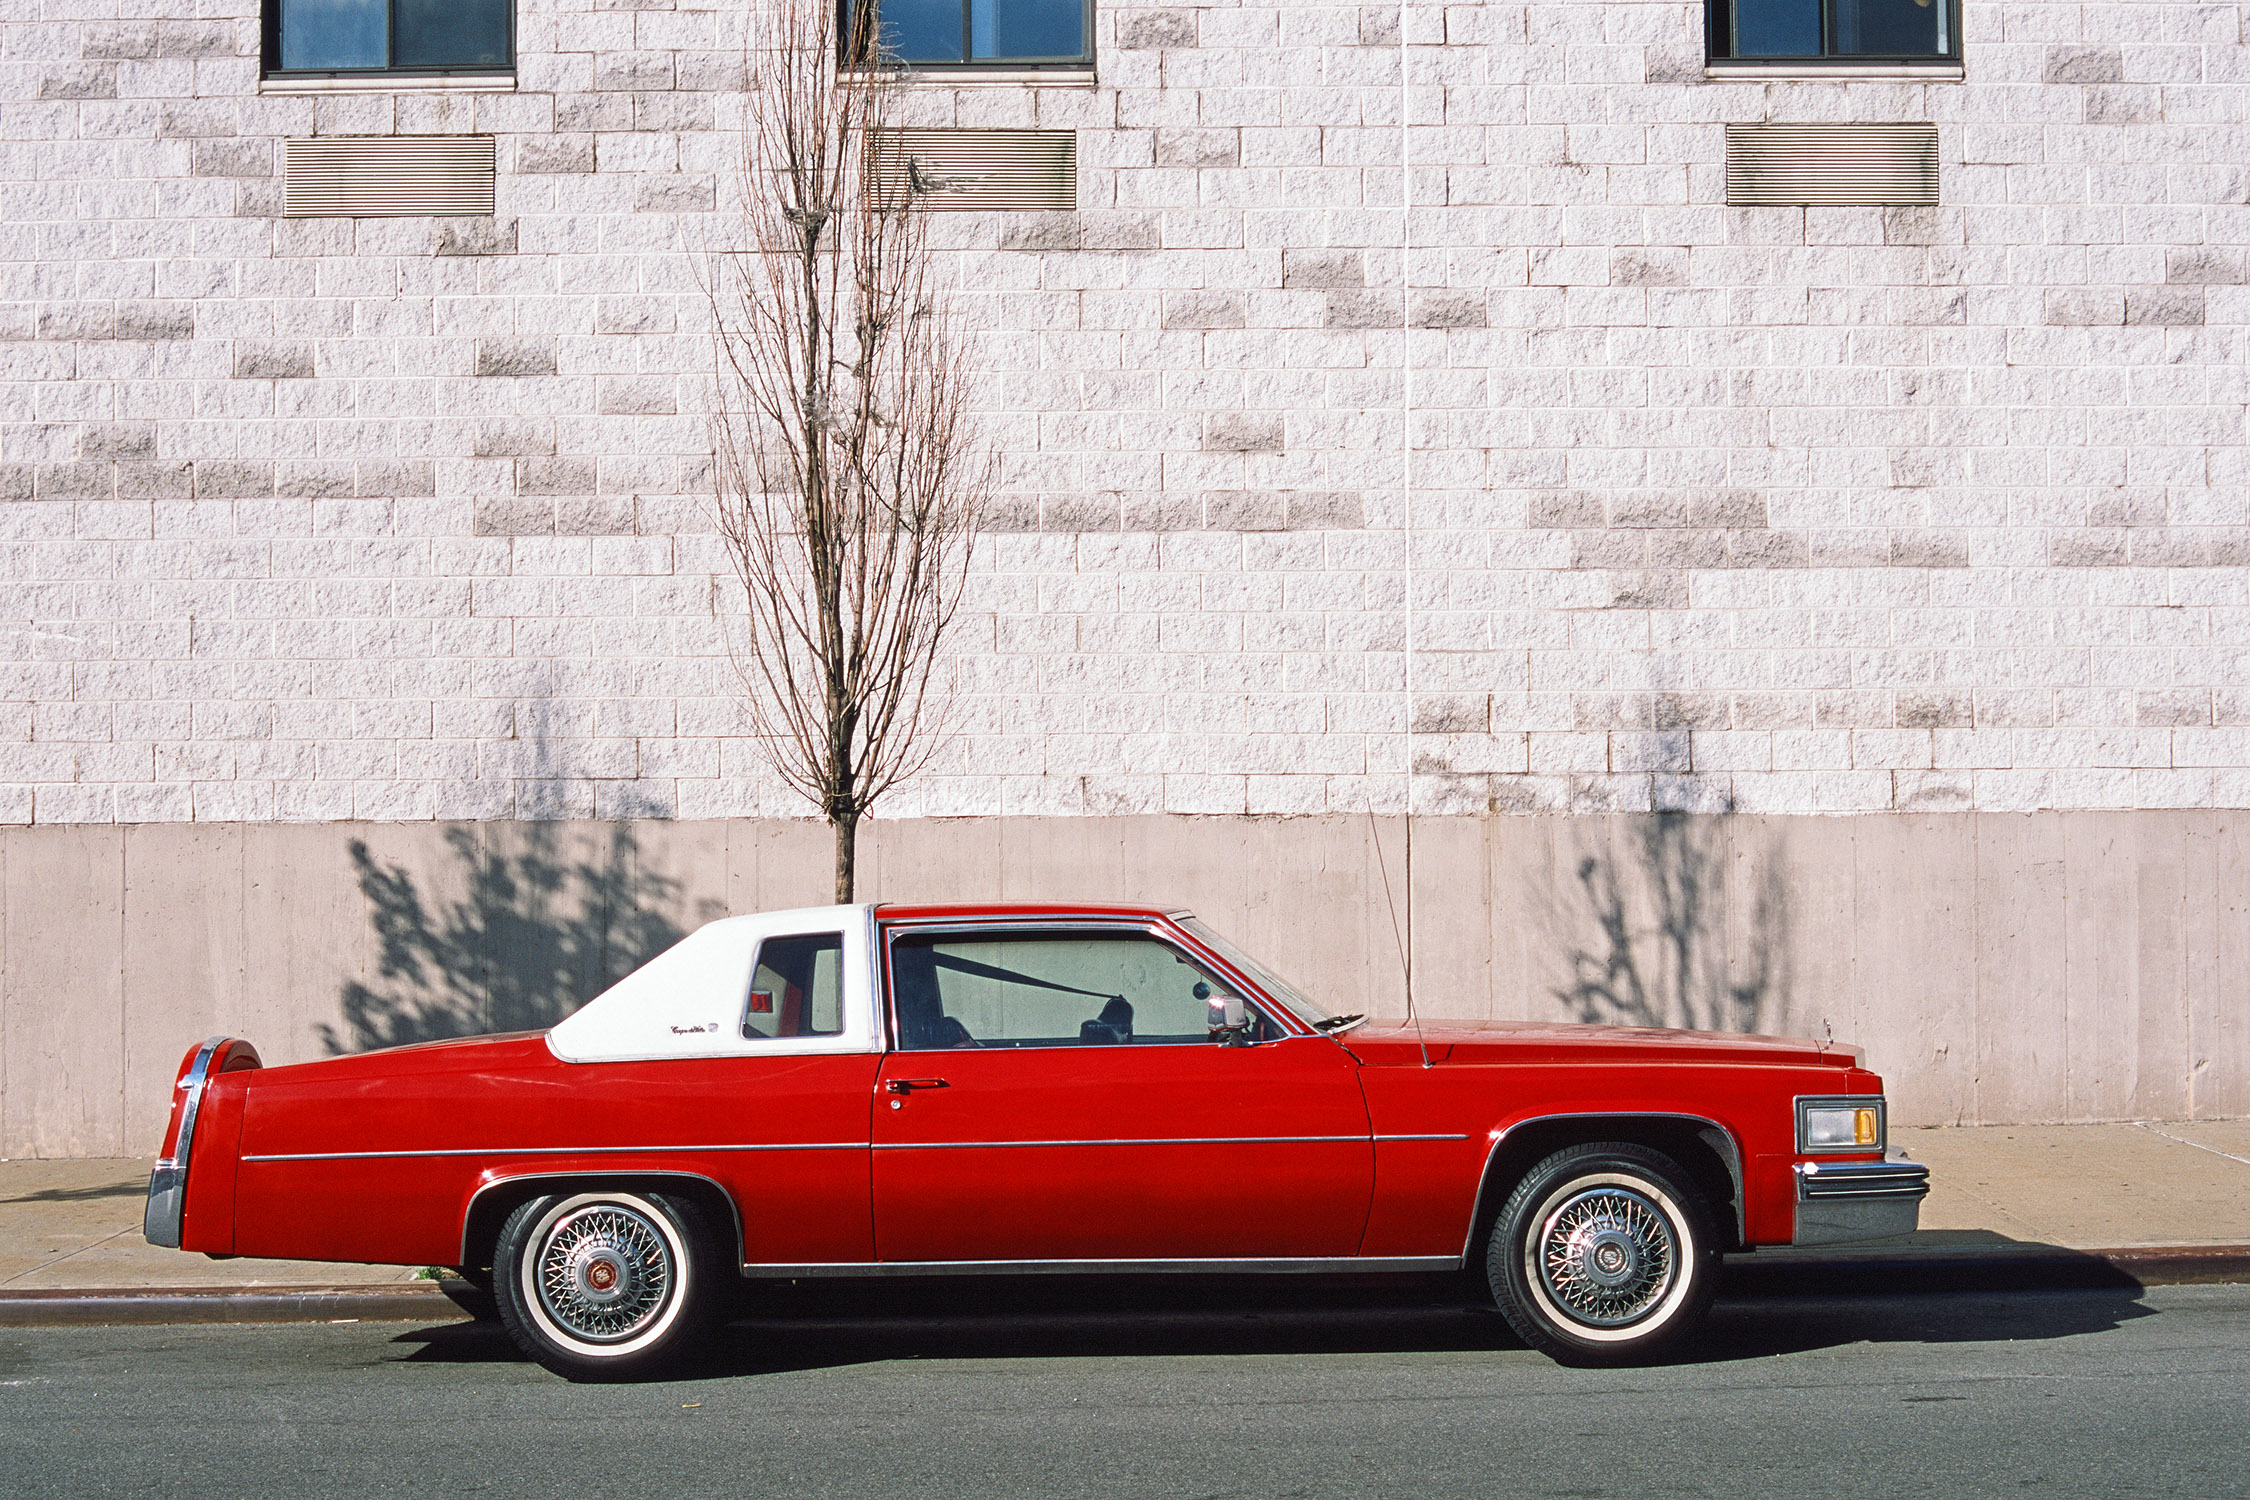
The Noritsu LS-600, a competitor to the Kodak F135+?
Noritsu is a Japanese photography equipment manufacturer. While little known by end consumers, Noritsu is a leader in photo lab processing equipment. Noritsu has historically occupied a unique position in the market since it doesn’t produce film. As a result, it often partnered with Fuji and Kodak, producing some of Fuji’s equipment or selling its own under the Kodak name.
The LS-600 is the current Noritsu mid-range film scanner model. Two other models provide additional capabilities: the HS-1100 enables faster scanning and the HS-1800 accepts medium format film.
This article focuses on the LS-600 for two reasons:
1. It can be used at home as a standalone scanner with a computer with a USB 2.0 port and Windows 7;
2. It is now regularly available on the secondary market for around $900-$1000.
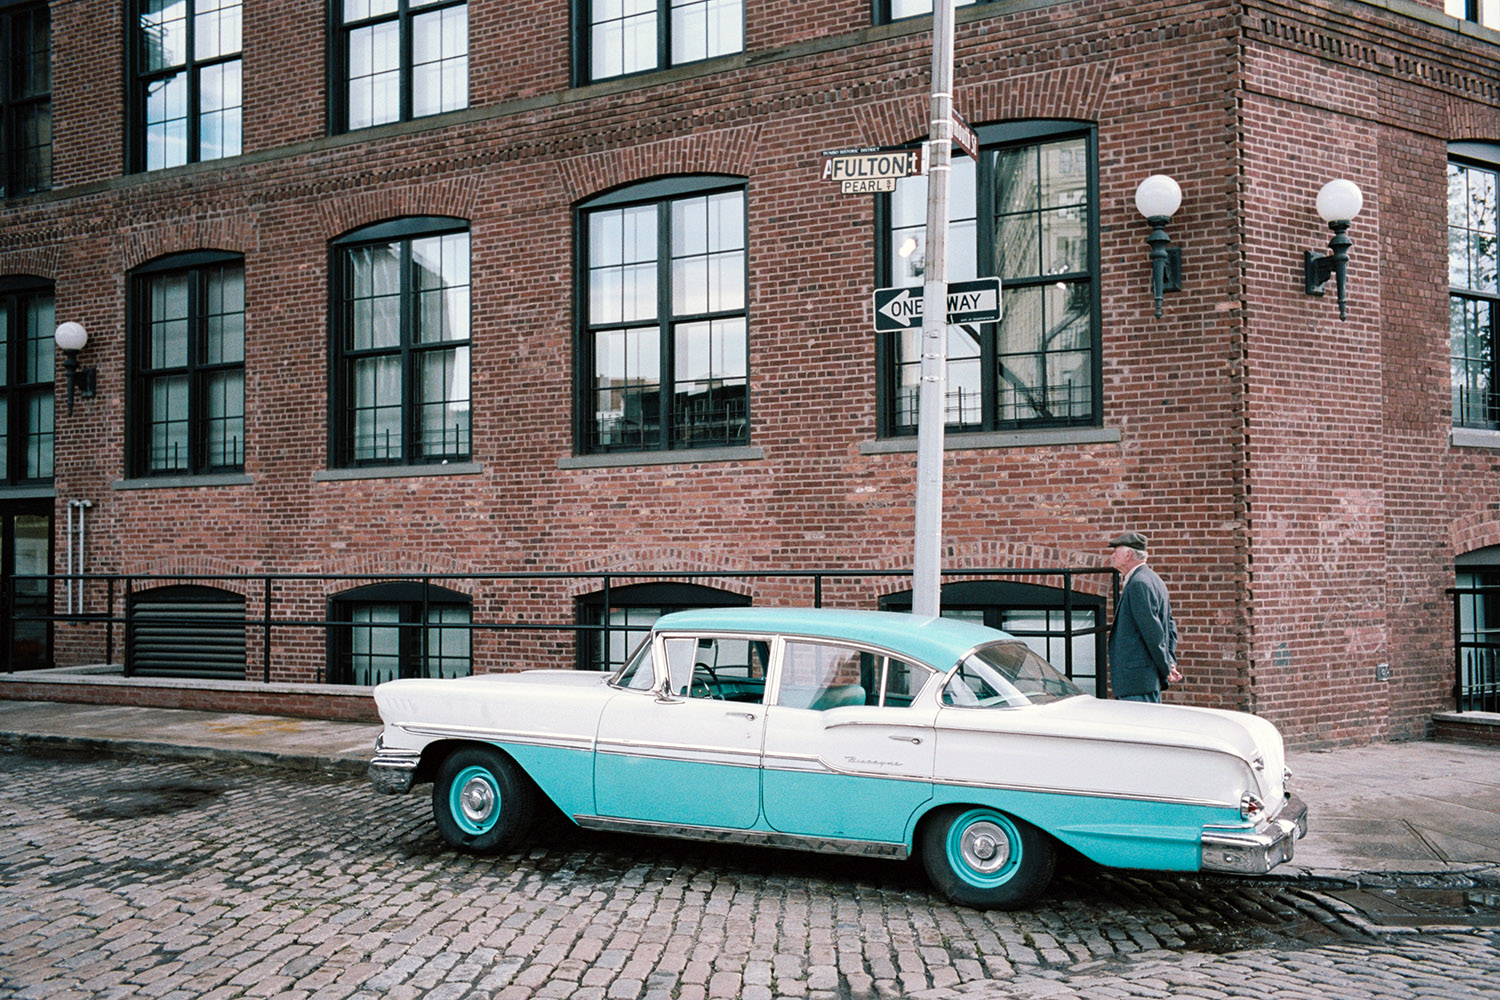
At the current price point, the Noritsu LS-600 competes directly with another mini lab scanner, the popular Kodak F135+. Because many photographers already use the F135+, this review provides side-by-side comparison of the LS-600’s results with the F135+’s. For a comparison of their specifications – see here.
As a starting point, I can say: if you like quality and speed of the Kodak F135 Plus, you will love the Noritsu LS-600!
 |
Specifications
The LS-600 scanner supports 35mm color negative, color positive, and black & white film. You can scan by full roll or by strip of 3 or more frames. The maximum definition of the scanner is 24 million pixels.
The scanner uses Digital ICE to remove dust and scratches from scanned images. (Note – Digital ICE doesn’t work with black & white film due to the nature of the substrate used on the film.)
| Manufacturer | Noritsu |
| Model | LS-600 |
| Light Source | LED |
| Max Optical Resolution | 24 million pixels, 6048×4011 |
| Film | Color Black & white Slide (unmounted in strips as small as a single negative ) |
| Insertion | Complete roll or in strips as small as a single negative |
| Dust Removal | Digital ICE |
| Price Second Market | $950 |
| Compatibility | Any computer running Windows XP, 7, 8 or 10 |
| Software | Twain Driver (Requires Adobe Photoshop to scan) |
| Focus Adjustment | YES via maintenance menu |
| Interface | USB 2.0 |
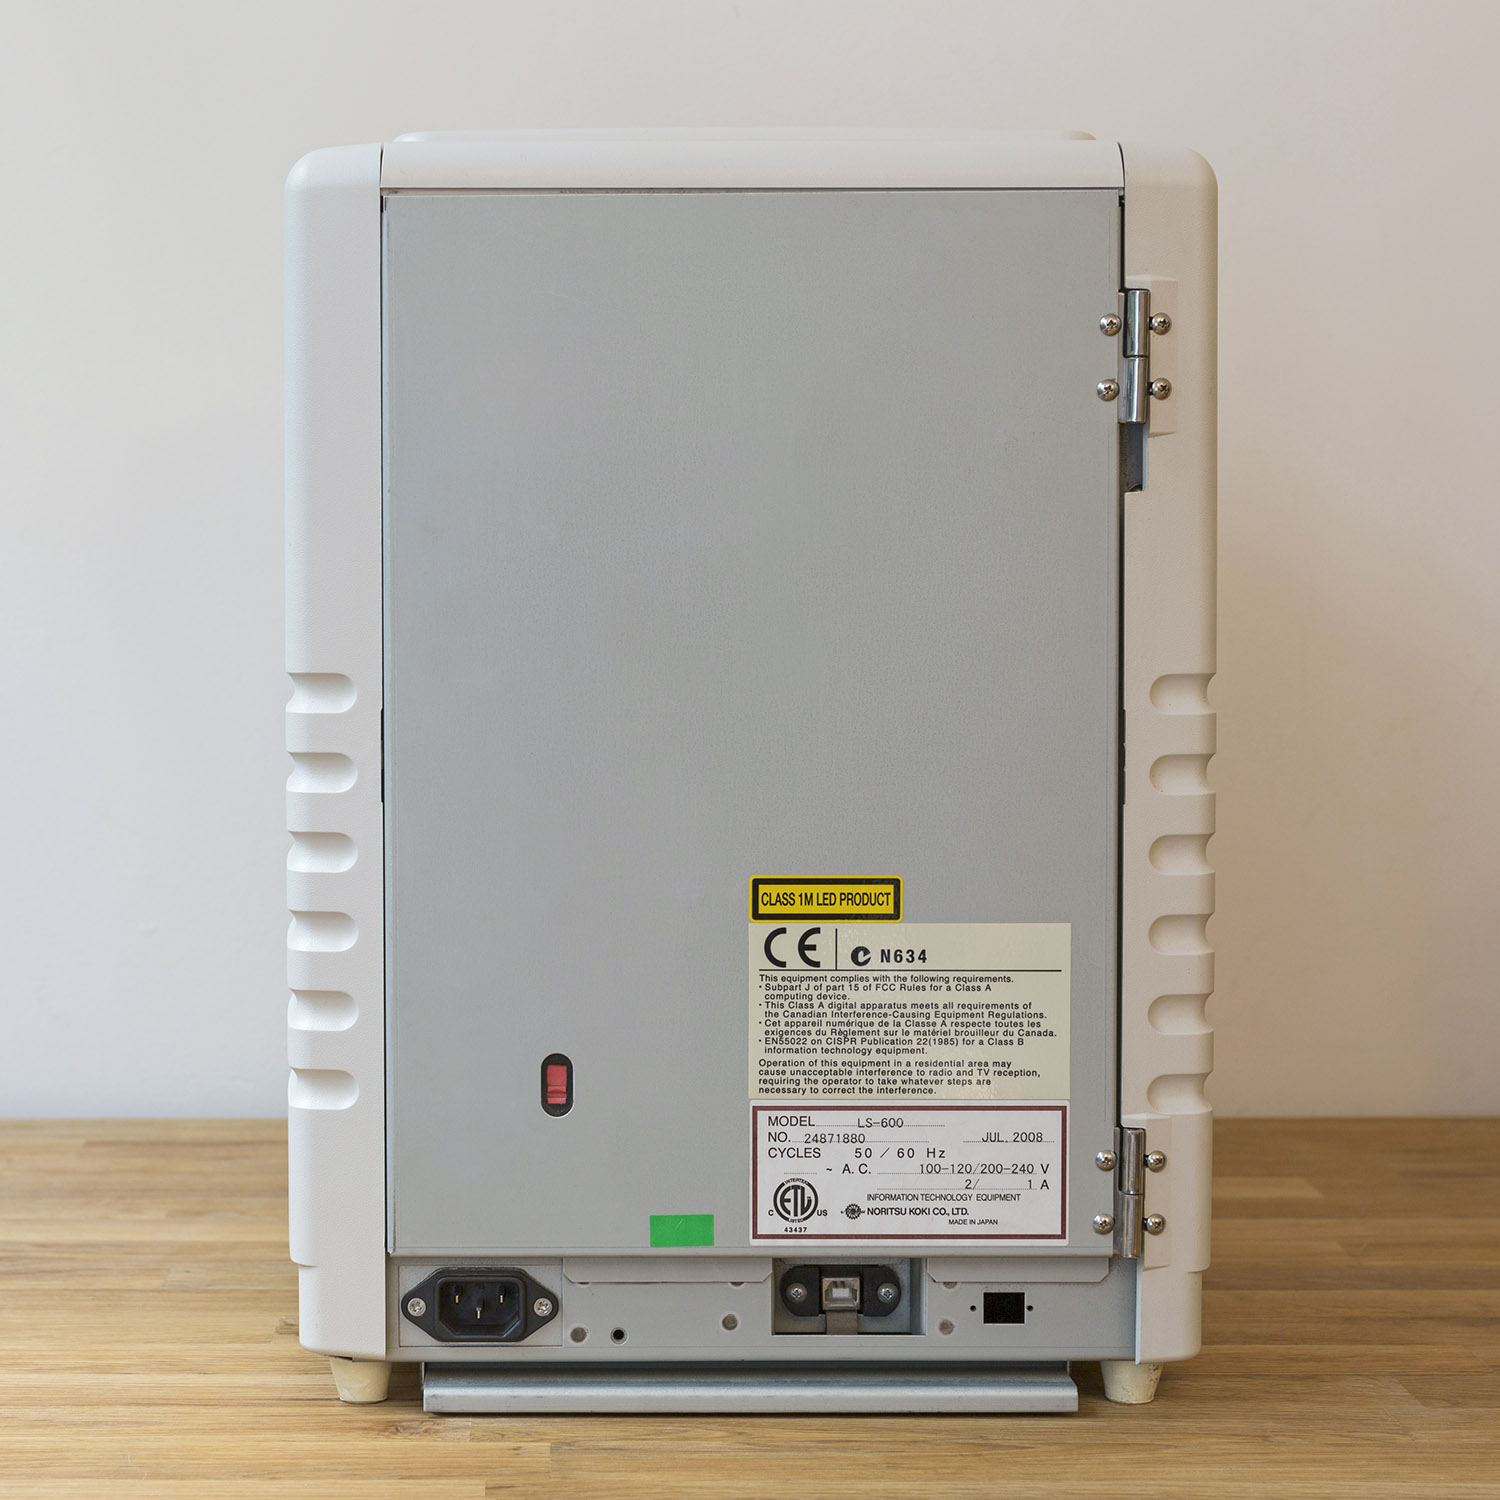
| Weight | 37 Lbs, 16.5 kg |
| Dimensions | Approximately 12″w x 17″d x 16″h, 30cm x 45cm x 40cm |
 |
 |
 |
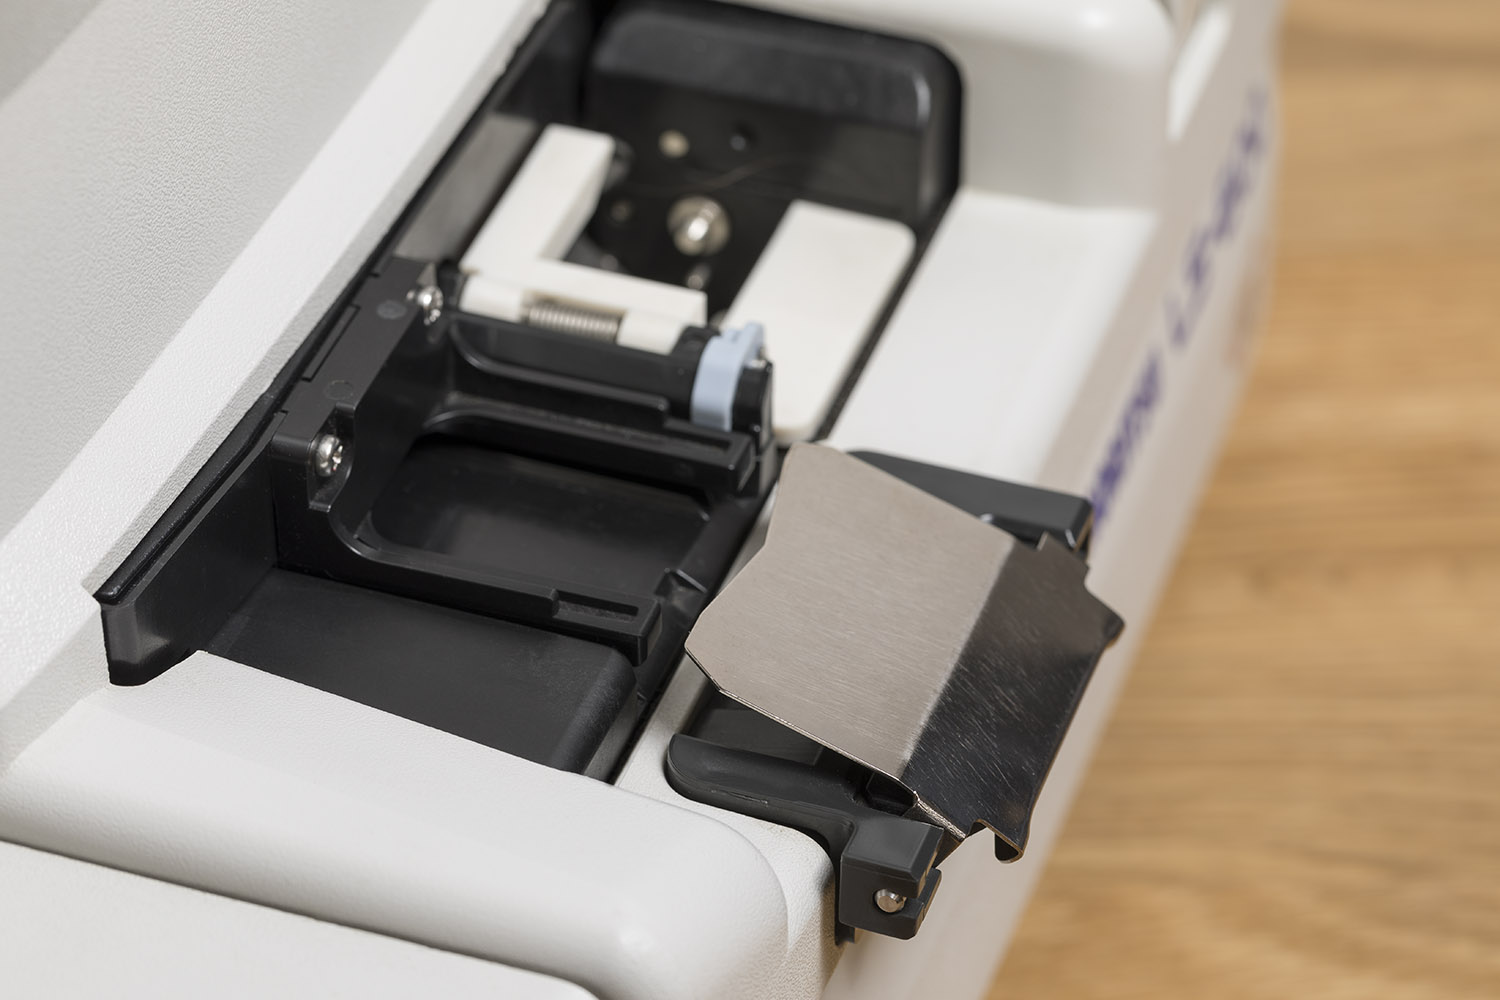
Film Retainer
The LS-600 comes with a film retainer located at the entrance of the film scanner. Often, this part is missing from second-hand scanners because it has been removed by a previous owner.
The film retainer is not essential, but it does help manage the ejection of the film during the scanning process. When you scan a short strip of 5-6 photos, it keeps the film from touching the desk/table you’re working on. When you scan a full roll of 36 frames, the retainer makes the roll into a loop so that’s shorter. For a full roll, I recommend placing the scanner at the edge of a table so that the loop can hang, but not touch the floor.
 |
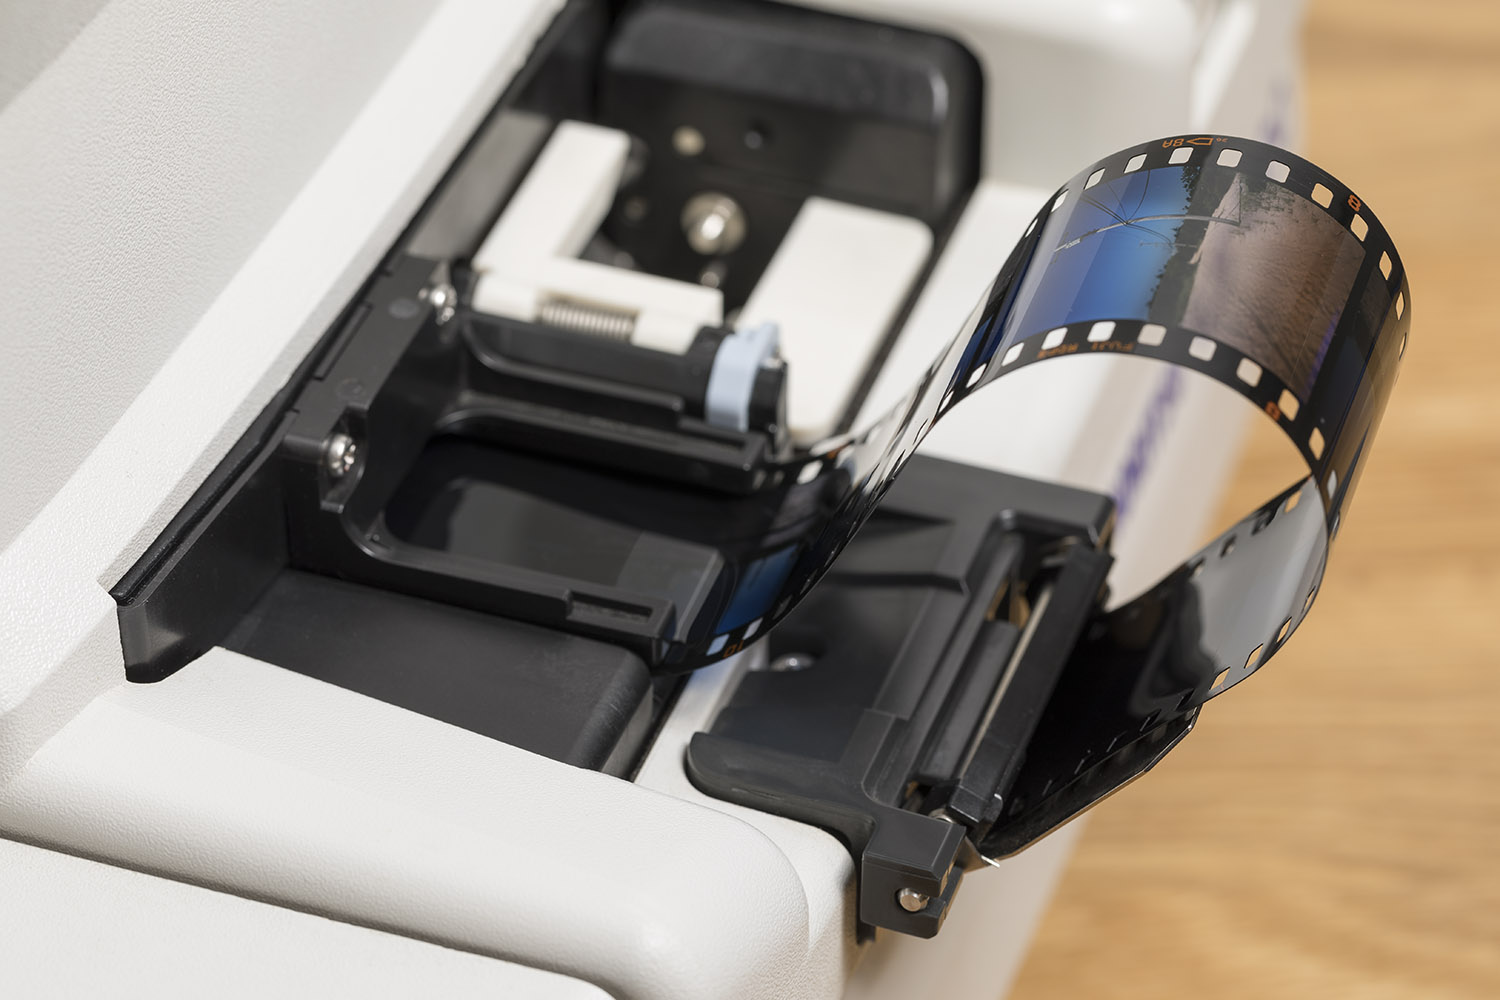 |
| Film retainer with no film | Film retainer with film ejected |
Documentation
This article summarizes key steps to getting started. If you want to more detail, here are some useful documents.
| File Name | Description | Version | Download |
| Installation Manual | Detailed installation of the TWAIN Driver and System Program | June 2008 | Download |
| Starting Guide | Basic operation and daily maintenance | April 2007 | Download |
| Operator Manual | Scanning and troubleshooting guide | April 2007 | Download |
| Service Manual | Advanced documentation for maintenance and repair | April 2007 | Download |
Installation
The Noritsu LS-600 offers flexibility, since it can work on any computer with a USB 2.0 port and any version of Windows from Windows XP to Windows 10. Note – this is a major advantage over the Kodak F135+ Plus, which is only compatible with the older and obsolete Windows XP.
To use the scanner, you will need to:
1. Install two applications supplied with the scanner: the Twain Driver and the System Program
2. Install a photo application that has the capability to import from a TWAIN device
Applications compatible with TWAIN Drivers
List of applications
Below is a list of software that can be used to import from a TWAIN Device and work with the LS-600.
(Details as of January 2017.)
| Software | Version | Cost | Compatibility | Development Status |
| Photoshop CS2 Adobe |
CS2 | License | Windows XP Windows 7 |
Discontinued |
| Picasa |
3.9.141.259 | Free | Windows XP, 7, 8.X, 10 | Discontinued as of March 2016 |
| XnView XnSoft |
2.39 | Free | Windows XP, 7, 8.X, 10 | Active |
| IrFanView Irfan Skiljan |
4.4 | Free | All windows versions from Windows 95 to Windows 10 | Active |
Note: Photoshop CS2 is available for download on Adobe servers (Requires creation of an Adobe account).
This download version is a replacement CS2 for people who originally paid for CS2. So, you must have a valid CS2 license to use it.
It’s offered for download by Adobe because the original activation servers had to be shut down for technical reasons, so if these licensed users needed to reinstall, it would not activate.
Pros and Cons
Below is a snapshot of the pros and cons of using each of these programs to scan with the LS-600.
| Software | Pros | Cons |
| Photoshop CS2 | • Powerful post-processing capabilities | • Discontinued • Not available anymore for purchase • Heavyweight if only for scan use • No batch processing • Browsing function requires Adobe Bridge |
| Picasa | • Free • User-friendly interface • Batch processing |
• Discontinued development • Only saves in jpg format at 85% quality |
| XnView | • Free • Active development • Batch processing • Lightweight • Minimal version is enough to use the scanner |
• No cons – probably the best option to scan with the LS-600 |
| IrFanView | • Free • Active development • Batch processing • Lightweight |
• Two separate windows for image browsing and thumbnail view |
Scanning
Adobe Photoshop: Pre-scan, Scan, Save
There are three main steps in completing a scan using the LS-600 with Adobe Photoshop:
1. Pre-scan: Insert the film (entire roll or strip of 3 or more frames). The scanner will complete a pre-scan as you load the film.
2. Scan: In the software, review the photos visible via pre-scan and select the photos you would like to scan. In this step, you can adjust the scan settings (contrast, color, balance, shadows, and highlights) on each photo to save time in post-processing. The scanner will eject the film as it scans.
3. Save: Manually save the files that the scanner has automatically opened in Photoshop.
XnView and IrFanView: Batch Setup, Pre-scan, Scan
There are three main steps in completing a scan using the LS-600 with XnView or IrFanView:
1. Batch Setup: Select Save Directory, define filename structure, select file format.
2. Pre-scan: Insert the film (entire roll or strip of 3 or more frames). The scanner will complete a pre-scan as you load the film.
3. Scan: In the software, review the photos visible via pre-scan and select the photos you would like to scan. In this step, you can adjust the scan settings (contrast, color, balance, shadows, and highlights on each photo to save time in post-processing. The scanner will eject the film as it scans.
Completing this process for a roll of 36 photos takes approximately 30 minutes. The Digital ICE function does not affect the scanning speed.
Launch Pre-Scan Screen (Adobe Photoshop)
First open Adobe Photoshop. Then, open the scanner application via the menu: File > Import > select LS-600. The scanner’s Main Screen will open.
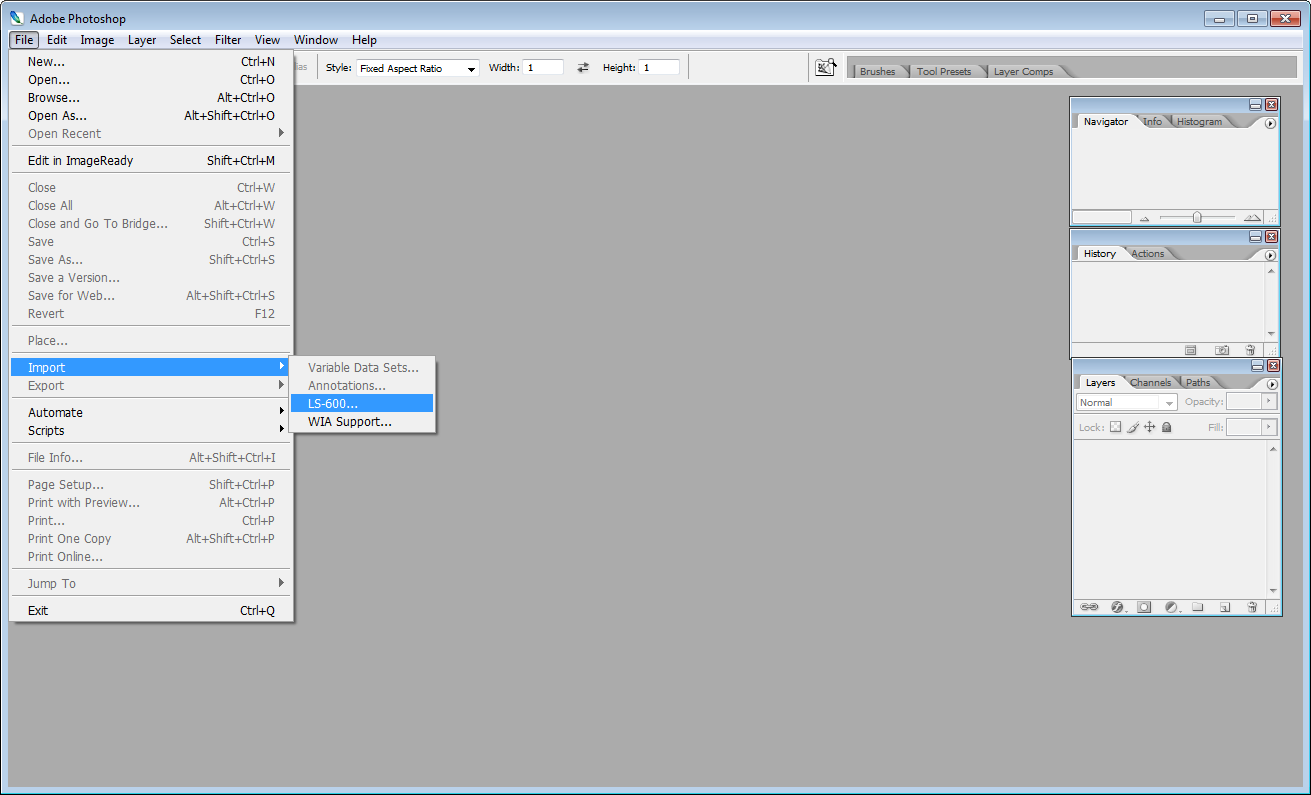
Photoshop Menu: File > Import > LS-600
Batch Setup (XnView)
First open XnView. Then, open the batch processing setup via the menu: File > Acquire into.
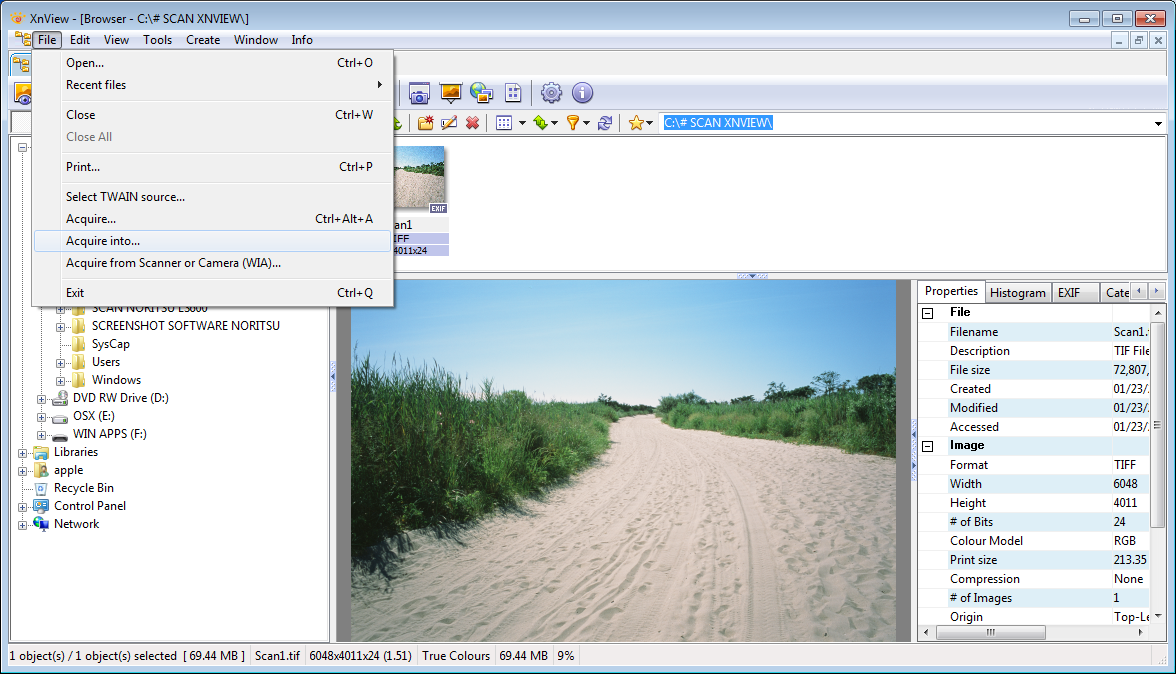
XnView Menu: File > Acquire Into
Define the parameters for the batch Processing: Directory Name, Filename structure and index, and File Format.

XnView Batch Setup Screen
When done, click on “Scan” to open the scanner’s main screen.
Pre-scan (Adobe Photoshop and XnView)
Once the Main Screen is open, select the settings for your scan.
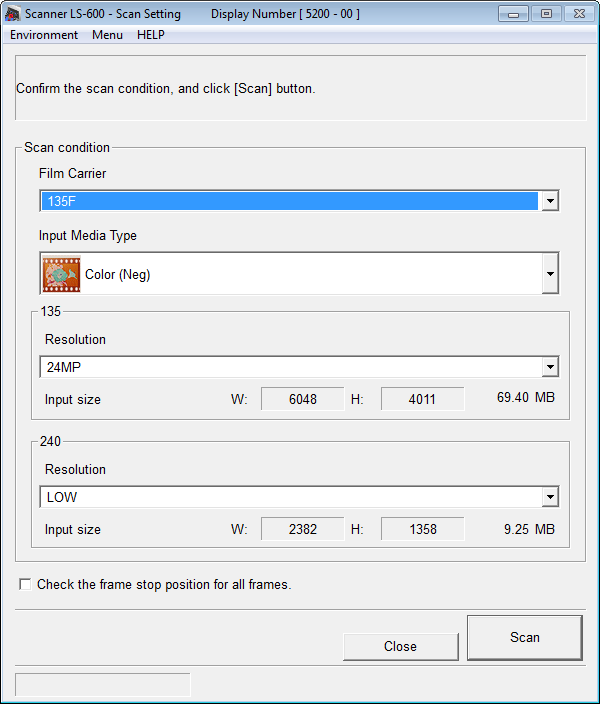
LS-600 Main Screen
There are 3 settings to define.
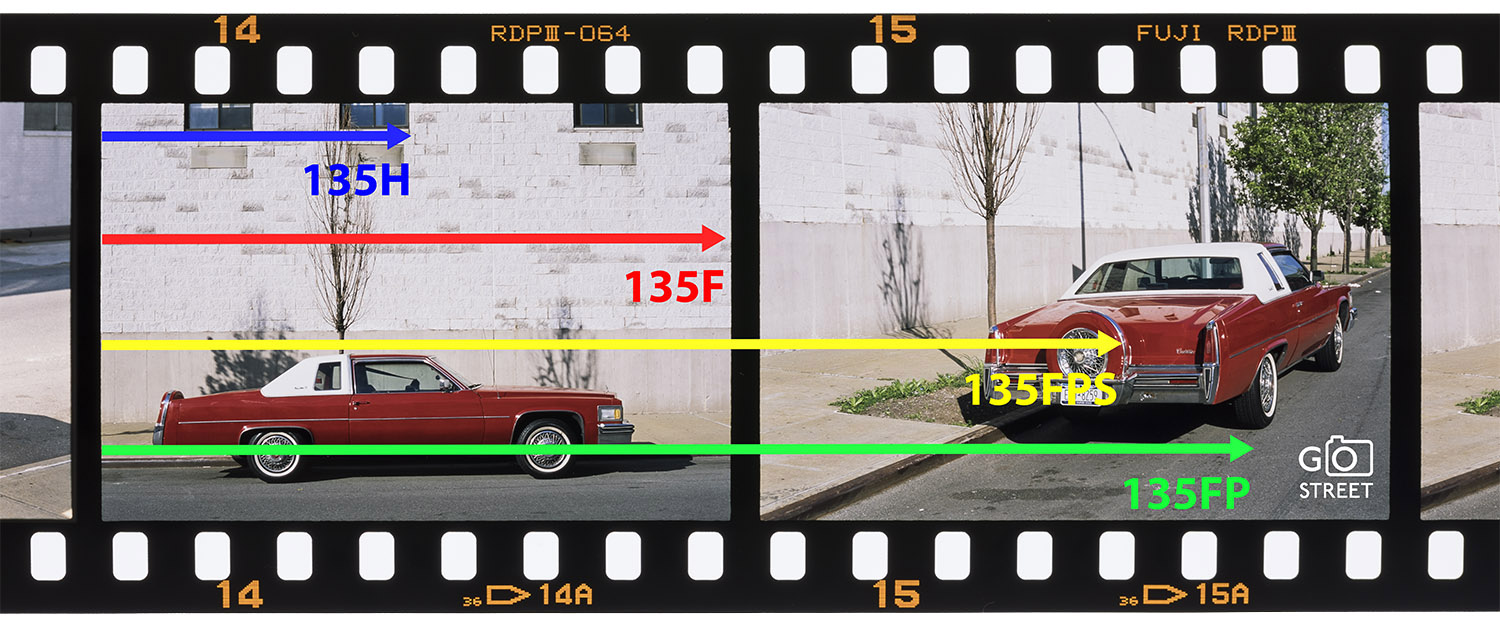
1. Film Carrier
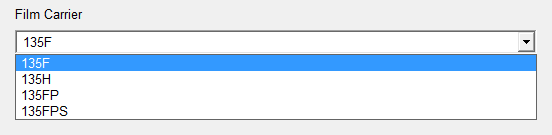
The LS-600 has two film carriers: one for the standard 35mm film and another one for the now defunct APX cassette. For the 35mm carrier, you will have to select the ratio of the scans.
| Selection | Description | Ratio | Usage |
| 135F | Full Frame | 1.5 | Standard 35mm film full-frame photos |
| 135H | Half Frame | 0.70 | For 35mm half-frame photos taken with cameras such as the Olympus Pen |
| 135FP | Panoramic | 2.73 | For 35mm panoramic photos taken with cameras such as the Hasselblad Xpan |
| 135FPS | Panoramic Short | 2.44 | For 35mm short panoramic photos |
2. Input Media Type
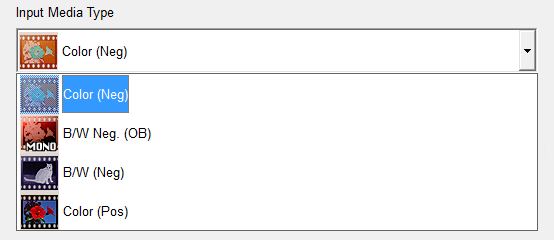
The LS-600 can scan four different types of films.
| Selection | Description | Usage | Example of film |
| Color (Neg) | Color Negative | C41 Standard Color Negative Film | Kodak Portra Kodak Ektar |
| B/W Neg. (OB) | Chromogenic Black & White | C41 Black & White Film (same developing process as negative color film ) |
Ilford XP2 |
| B/W (Neg) | Panchromatic Black & White Negative Film | Standard Black & White Film | Kodak Tri-X Kodak T-Max |
| Color (Pos) | Color Positive Film | E-6 slide | Fuji Fujichrome Provia |
3. Resolution
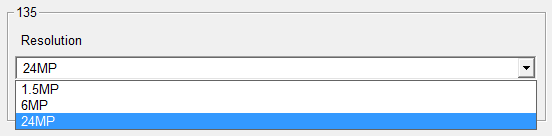
The LS-600 offers three levels of resolution.
| Selection | Resolution (135F) | File Size (TIFF Format) |
| 1.5MP | 1512 x 1002 | 4.33 MB |
| 6MP | 3024 x 2005 | 17.35 MB |
| 24MP | 6048 x 4011 | 69.40 MB |
When you are completed selecting your settings, click Scan. At this point, insert your entire roll of strip into the scanner. The pre-scan takes about one minute for a roll of 36 photos.
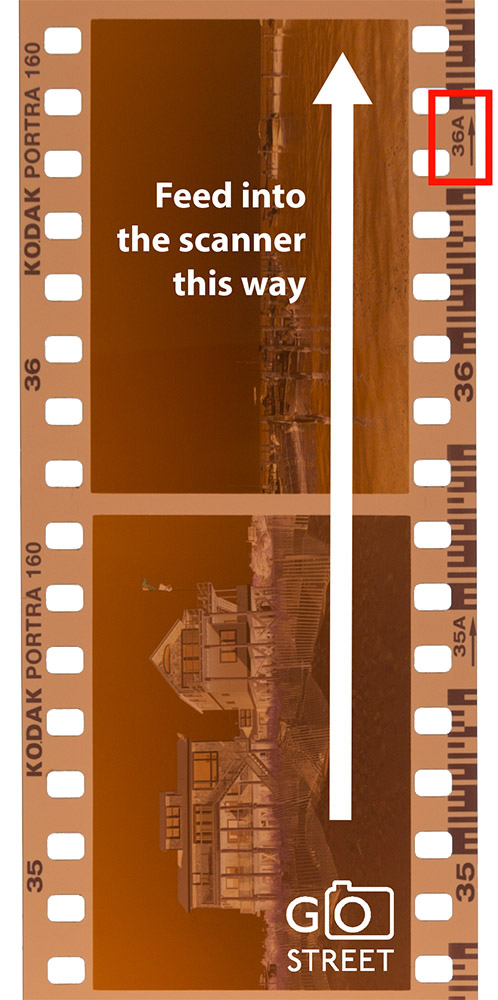
Insert the film starting with the largest frame number.
Scan
Your pre-scanned photos will now appear in a new window. You’ll be able to view six photos at a time.
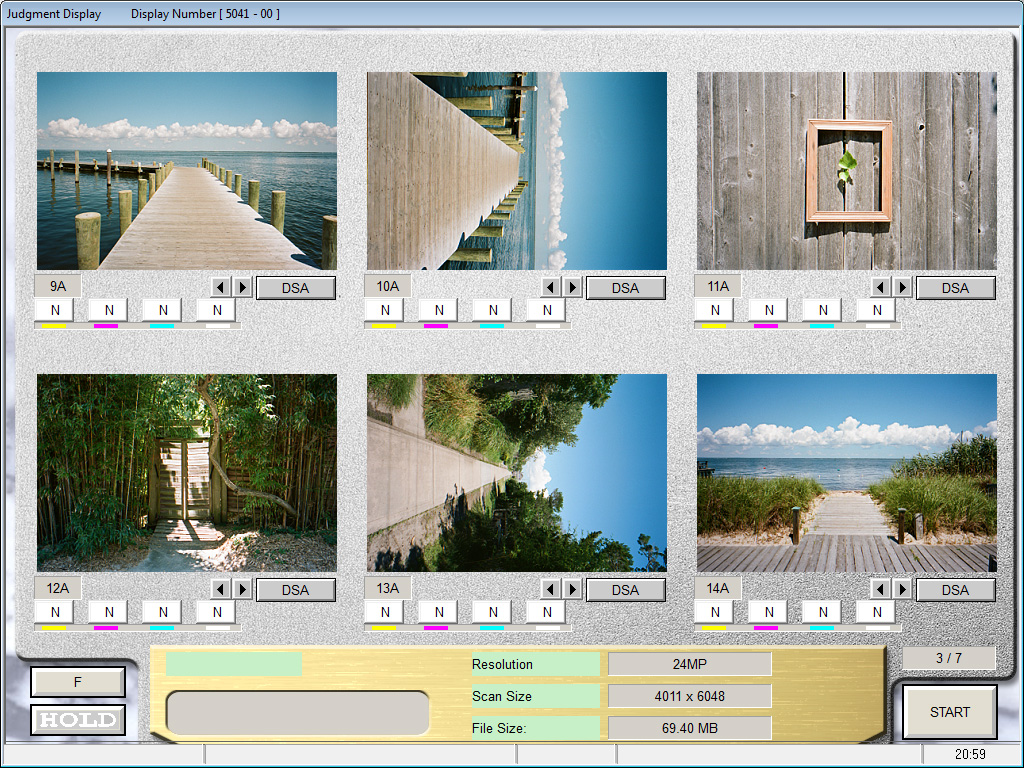
Review the photos to select which to scan. Right-click on the photo to select or unselect the photo.
 |
 |
| Selected Photo | Unselected photo |
As you review the pre-scanned images, you have the option to adjust the settings for specific photos. Adding this step adds time to the scanning process, but can save time in post-processing.
There are four key settings to consider adjusting.
1. Framing
To reframe the scan, use the small arrows under the photo to move the image to the right or left. This adjustment is most important when you have subjects near the edges of your photos.
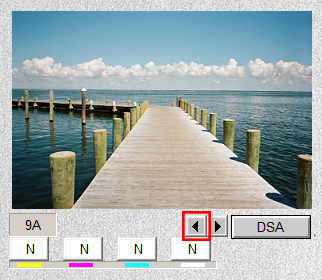 |
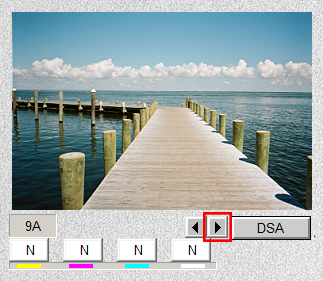 |
| Reframe to the right | Reframe to the left |
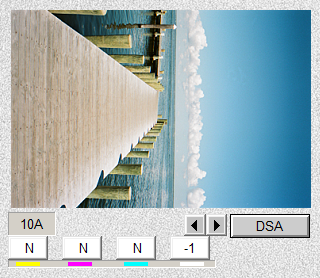
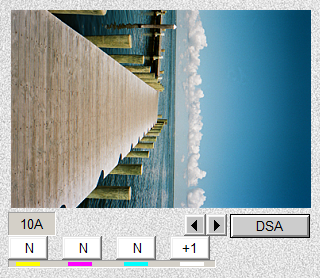
2. Exposure
You can adjust the exposure by clicking on the button above the white rectangle. A right click will reduce the exposure. A left click will increase the exposure.
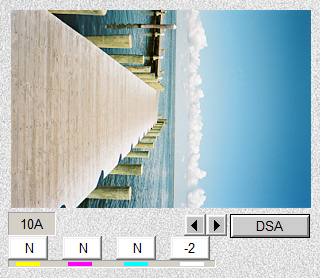 |
 |
 |
 |
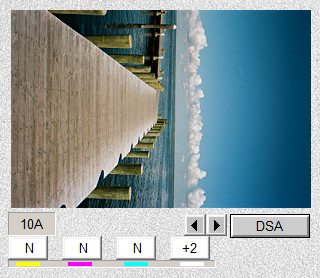 |
| Exposure -2 | Exposure -1 | Exposure 0 | Exposure +1 | Exposure +2 |
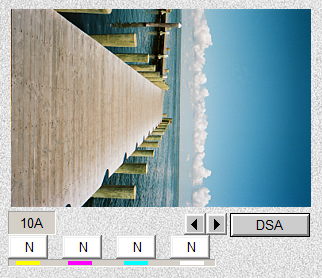
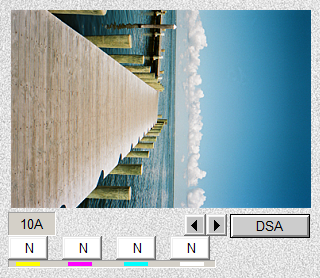
3. White Balance
As with the exposure, you can modify the white balance by clicking on the buttons above each subtractive colors: yellow, magenta, and cyan. A right click will reduce the intensity of the color. A left click will increase the intensity of the color.
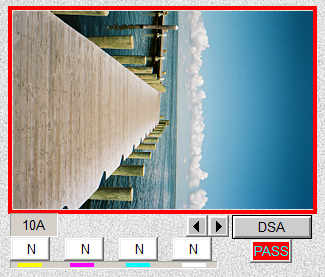
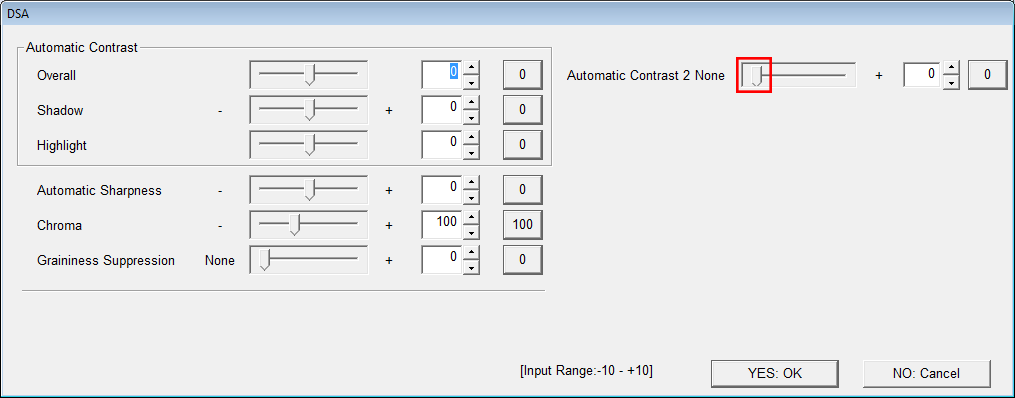
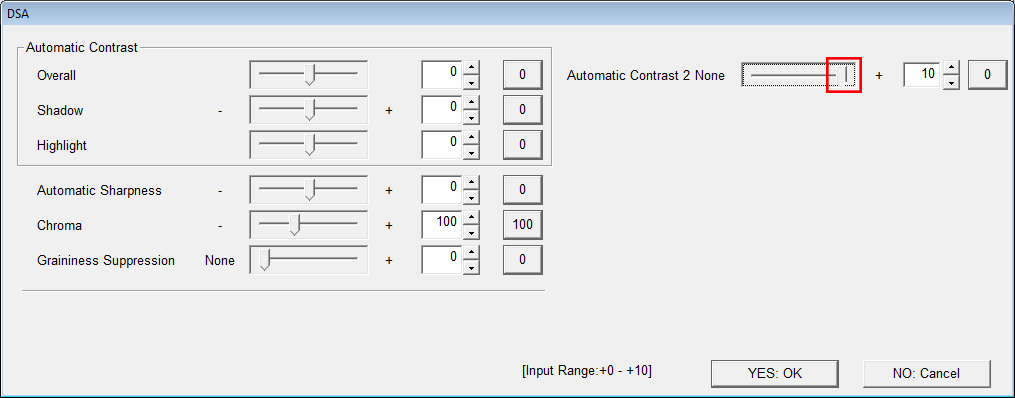
4. Automatic Contrast
Other adjustments, such as the automatic contrast, can be made by opening the DSA screen for each photo. Click on the DSA button to open the screen.
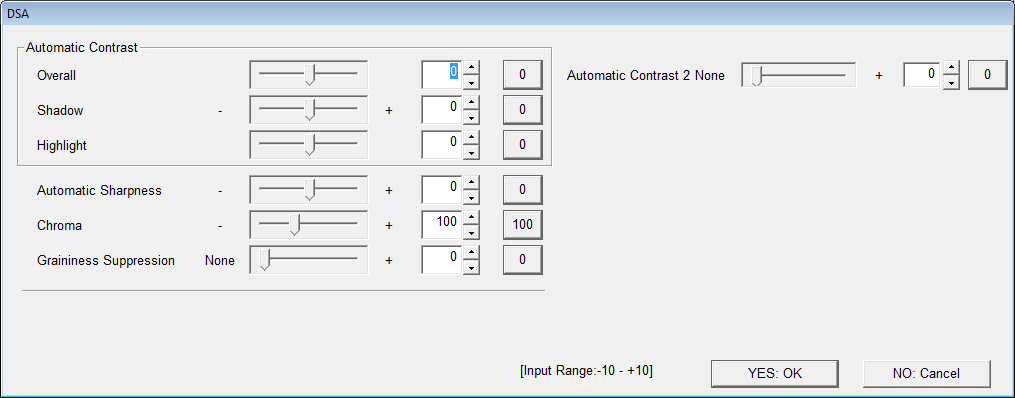
By default, the Automatic Contrast slider is on “0”. I strongly recommend to move the slider around “5” or even higher.
Below you can see an example of the effect on highlights by moving the slider to the maximum of “10”. As you can see, you retrieve more details in the highlight with less contrast.
| Automatic Contrast Activated | Automatic Contrast Deactivated |
 |
 |
 |
 |
 |
 |
Quality of Scans
The Noritsu LS-600 produces exceptionally high quality scans.
Below are examples of various film types. All of these images can be downloaded in full resolution – feel free to take a look and share your observations in the Comments!
Kodak T-Max 400 ISO. 24MP File Download

Kodak T-Max 100 ISO. 24MP File Download
Kodak Portra Pro 160 ISO. 24MP File Download

Kodak Portra Pro 160 ISO. 24MP File Download
Kodak Portra Pro 160 ISO. 24MP File Download

Fuji Provia 100F. 24MP File Download
Fuji Provia 100F. 24MP File Download
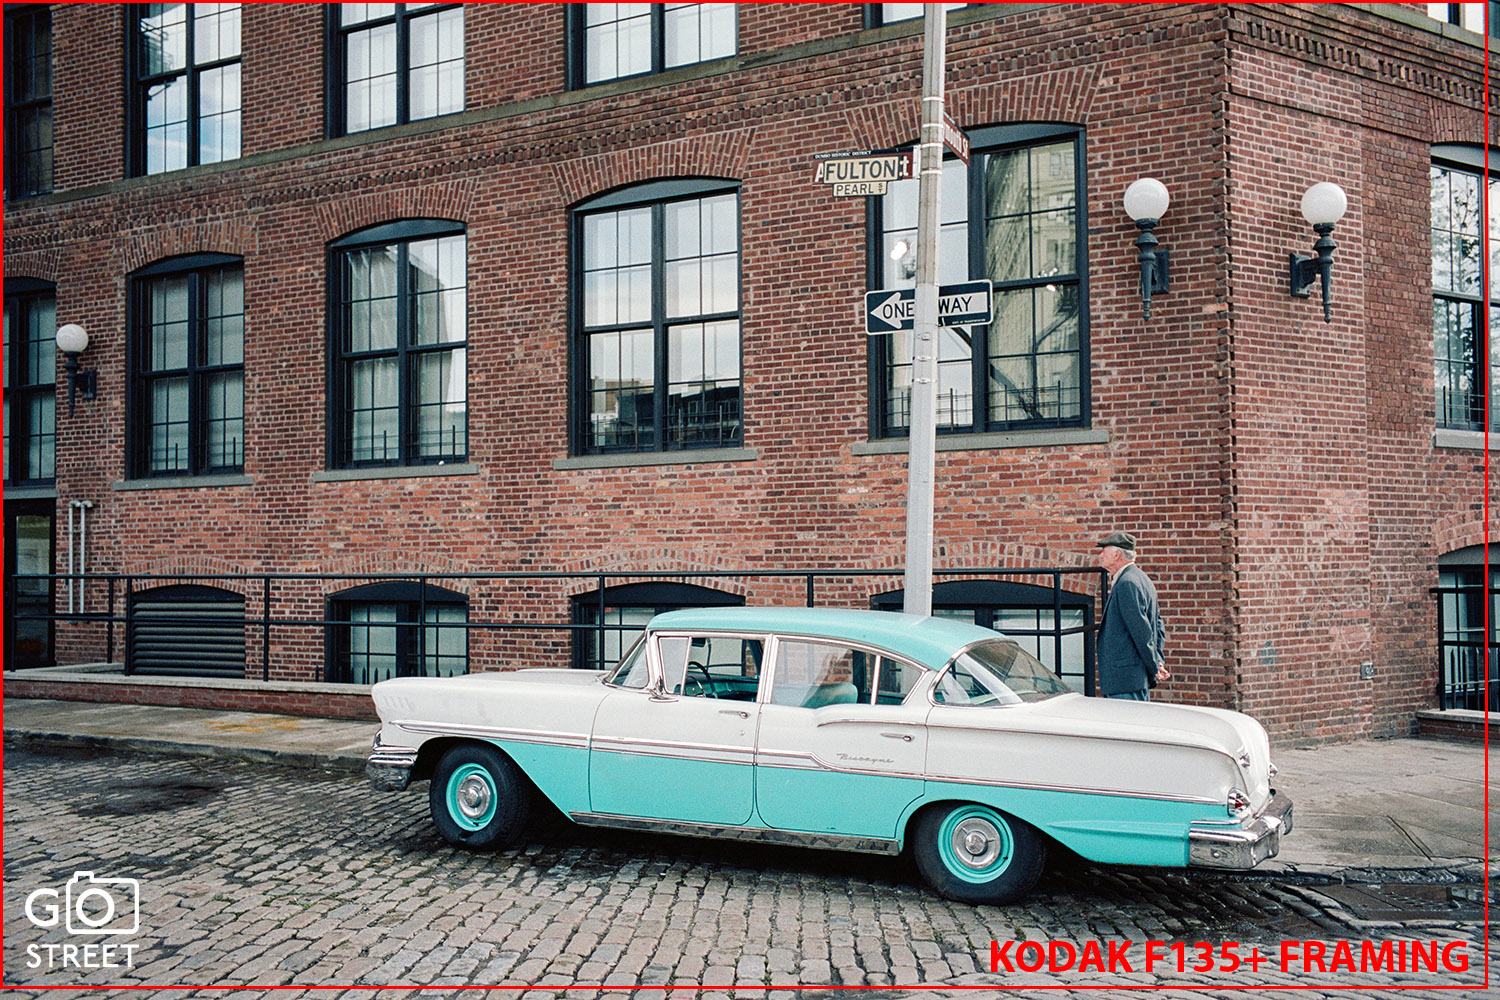
Quick Comparison with the Kodak F135+
If you’re in the market for a scanner, you may be asking yourself: is the quality of the LS-600 really that much higher than other scanners’? How different is it really from other products on the market?
To give you a snapshot, below is a comparison of definition, framing, and dynamic range of scans from the LS-600 and its primary competitor, the Kodak F135+.
Definition
On the surface, there’s no competition here: the Noritsu LS-600 scans up to 24 million pixels, four times the Kodak F135+’s maximum definition of 6 million pixels.
More pixels mean higher quality, right?
Not always. Quality can be influenced by additional factors, such as the quality of the focusing system and the scanner’s sensor.
I tested multiple type of films such as Kodak portra pro 160 and 400, Kodak Tri-x 400 or T-Max 100 and 400
For all these films, I was able to see a clear increase of definition by using the 24 million pixels of the Noritsu compared to the 6 million pixels of the Kodak.
As you can see from the images below, the Noritsu LS-600 improves the definition of the scan.
| Scan 6MP at 100% Kodak F135 Plus | Scan 24MP at 100% Noritsu LS-600 |
 |
 |
Framing
The Kodak F135+ crops photos more than the Nortisu LS-600. If you have the tendency to compose your photos with subjects close to the edge, the Noritsu may be a better choice for you.
| Framing Kodak F135 Plus | Framing Noritsu LS-600 |
 |
 |
Dynamic Range
The dynamic range of the Nortisu LS-600 appears to be slightly better than the Kodak F135+’s. More details are visible in the shadows and highlights. In the sample scans below, you can see the difference in the details of the boat’s engine.
| Dynamic Range Kodak F135 Plus | Dynamic Range Noritsu LS-600 |
 |
 |
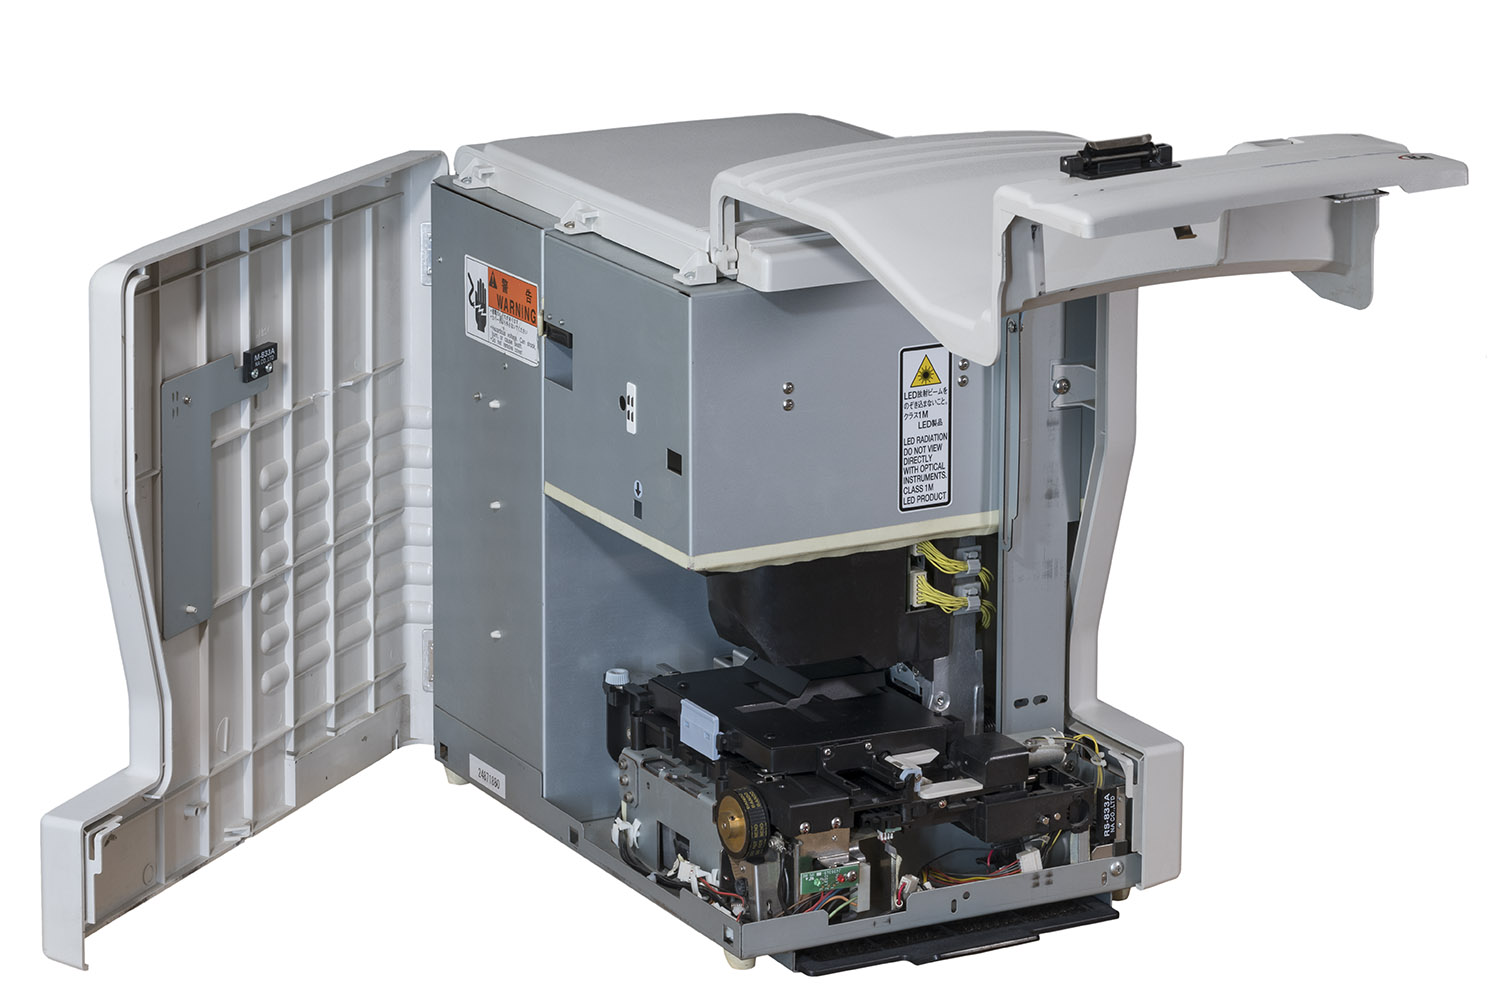
Maintenance
Cleaning
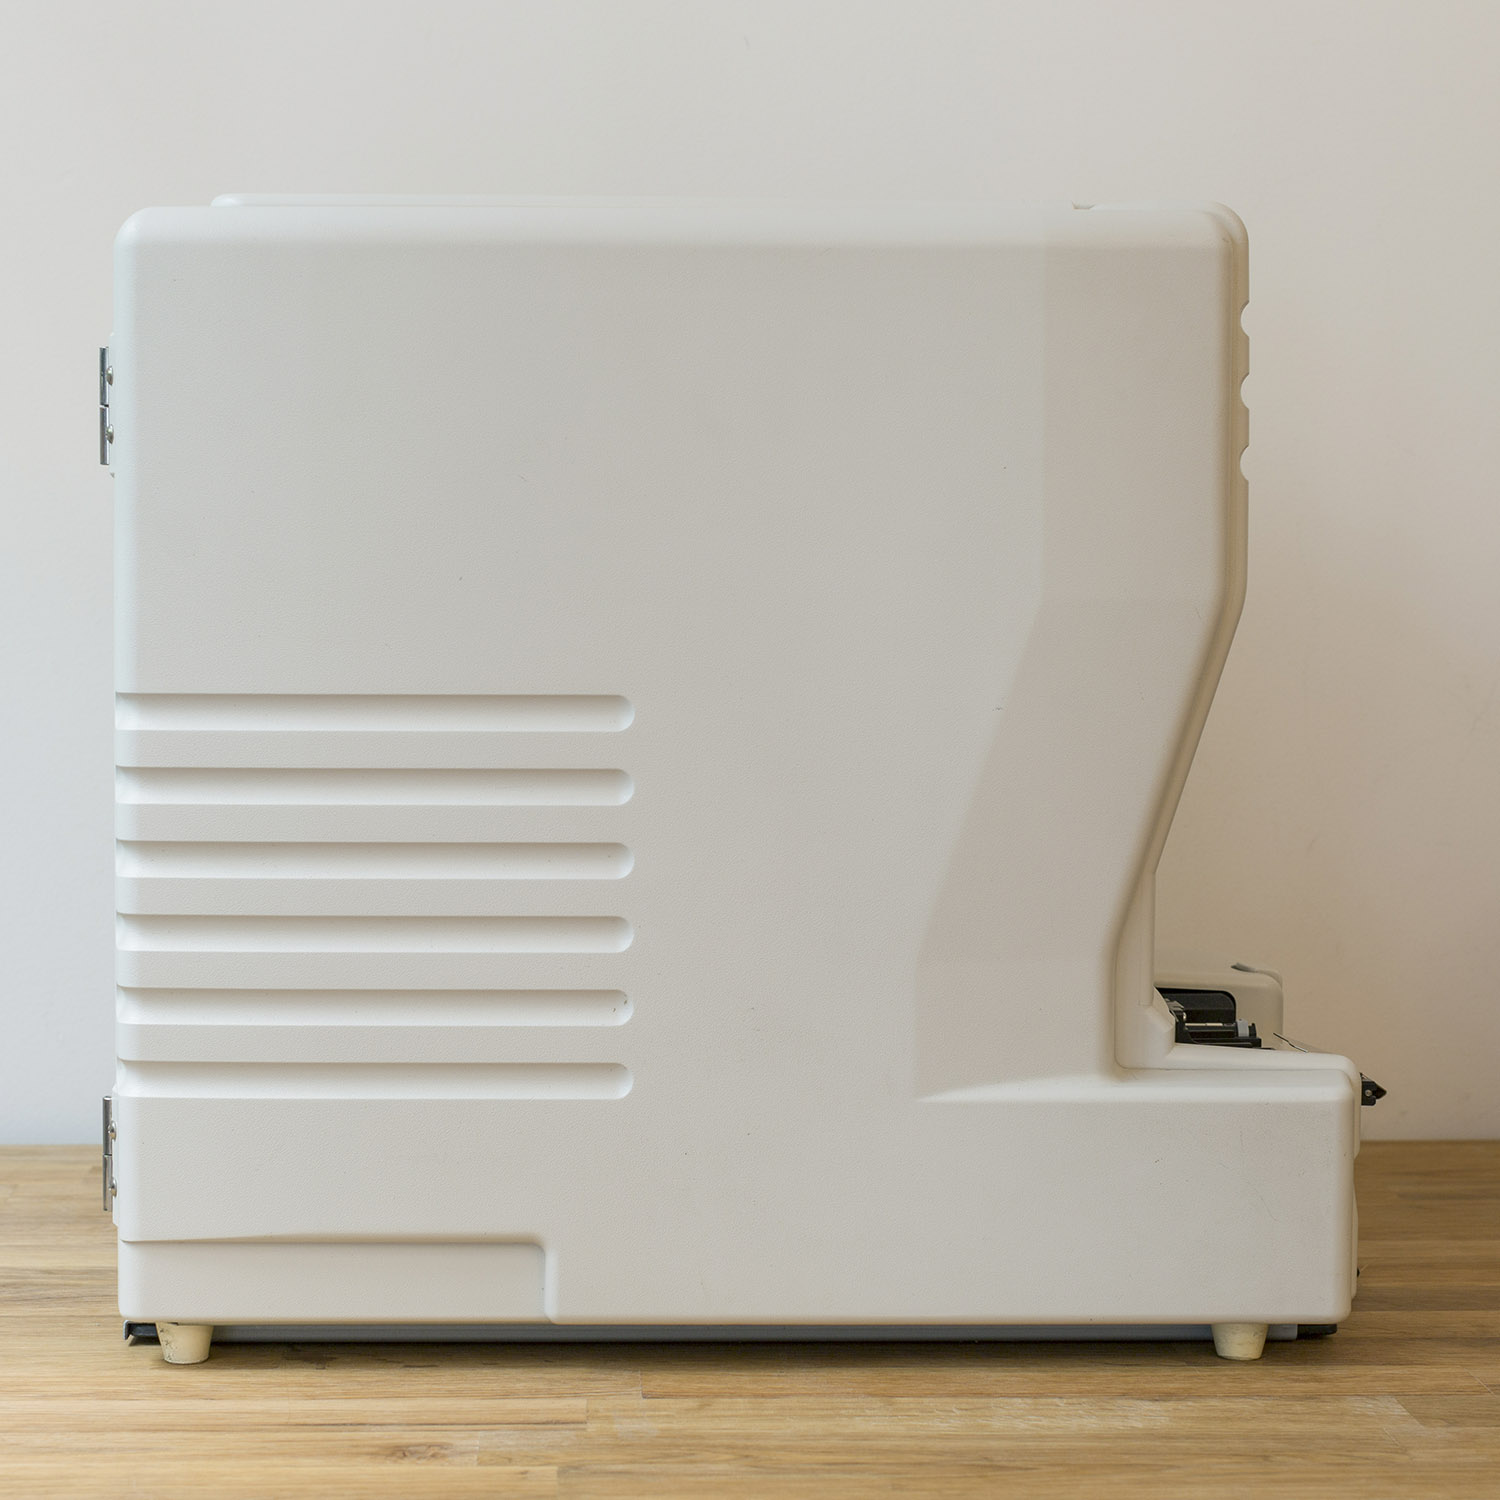
The LS-600 can be opened without tools from the front and from one side. You can easily access the inside and efficiently clean any dust.
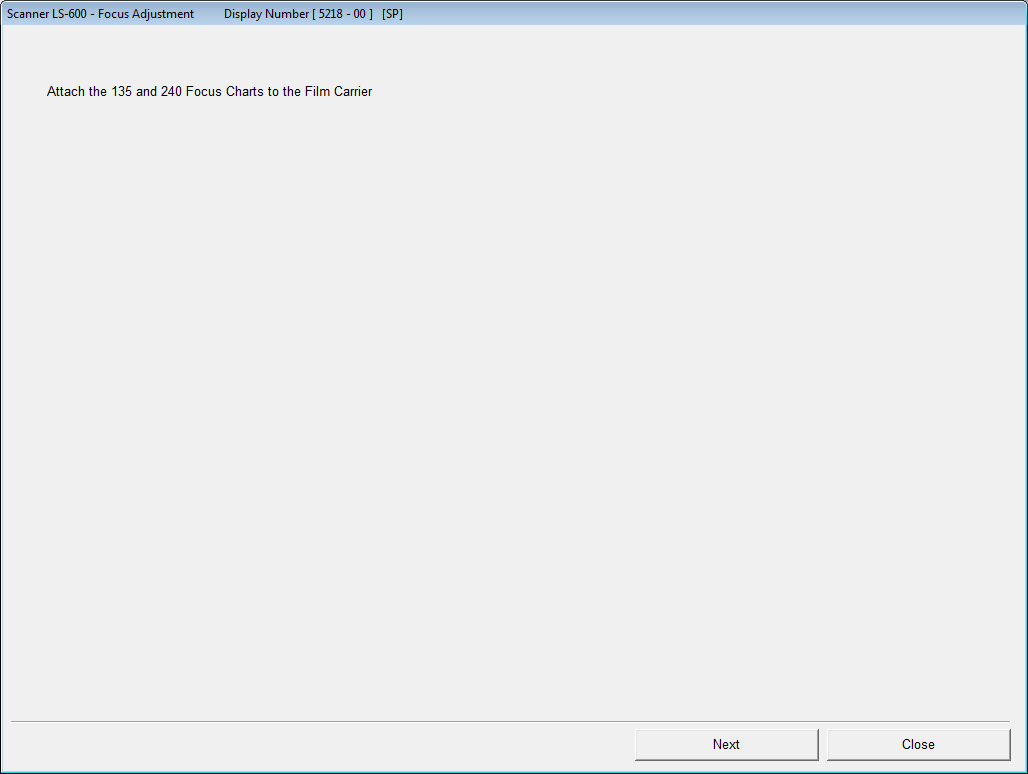
Focus Adjustment
If your scans are not sharp, you may need to adjust the focus of the scanner.
The good news is you can do this yourself using a hidden menu that you can access with a passcode. The bad news the adjustment requires an adjustment chart available only to Noritsu technicians. Fortunately, there’s a workaround: manually changes the focus adjustment number and re-scan the same film until you see the improvement you’re aiming for. Using this method, I’ve been able to fine-tune through just a couple of tries.
While relatively simple, these focus adjustments can be intimidating.
Here are the steps to follow:
First, you need to access the Scanner Unit Adjustment Menu.
On the scanner main screen, click on “Menu”:

The following screen will appear:
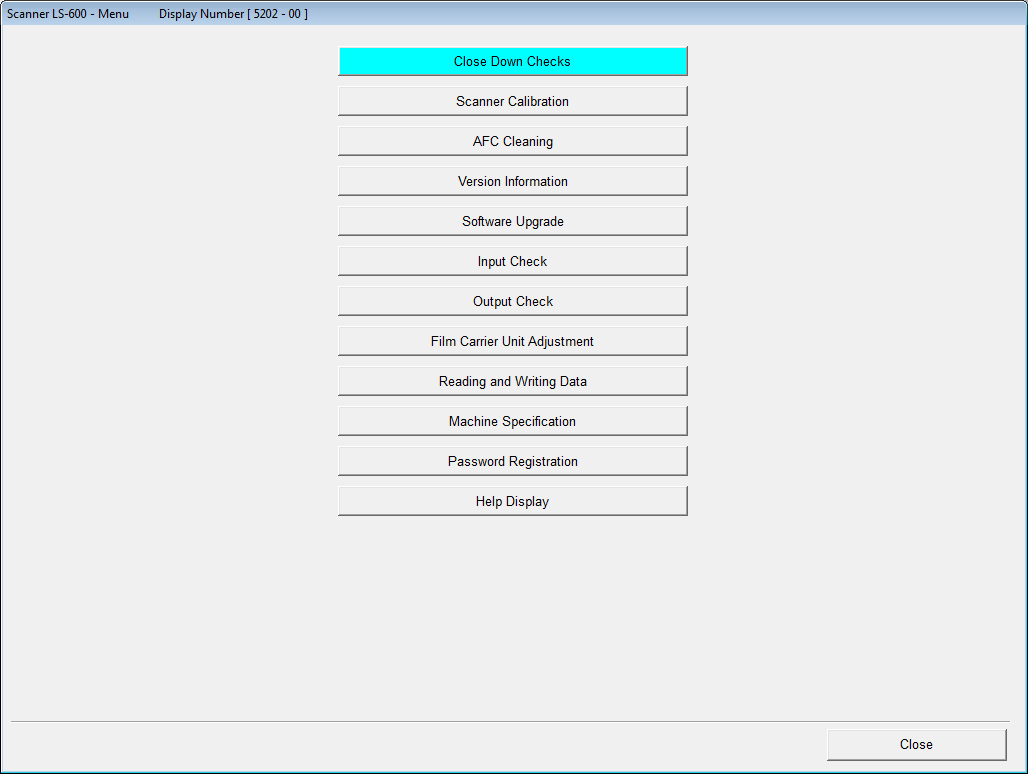
Press F1 and F9 to display the password window:
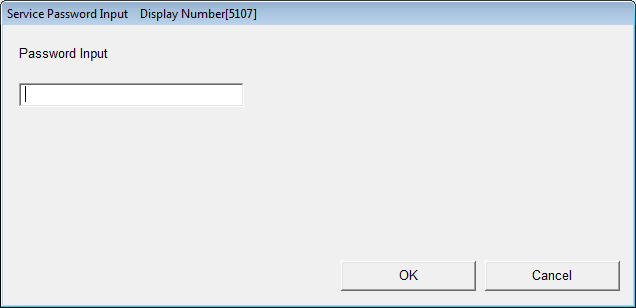
Enter password 2260 and click “OK”.
Two additional menus in blue are now available on the list:
Scanner Unit Adjustment
Self-diagnostic
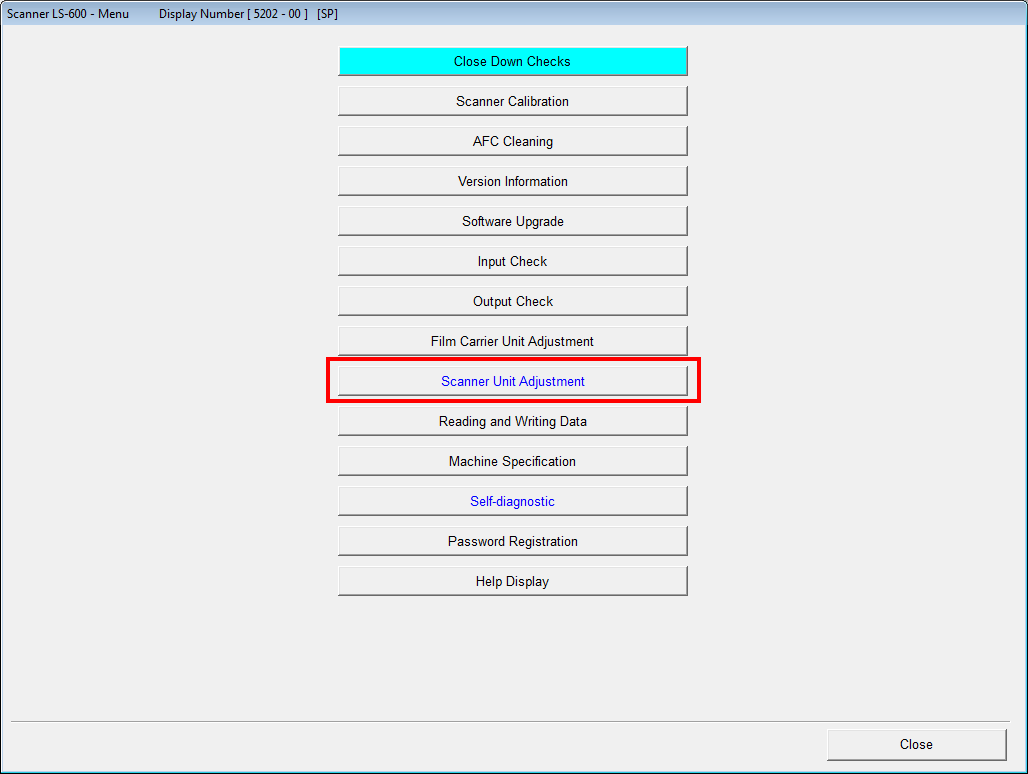
Click on “scanner Unit Adjustment”.
The following screen will appear:
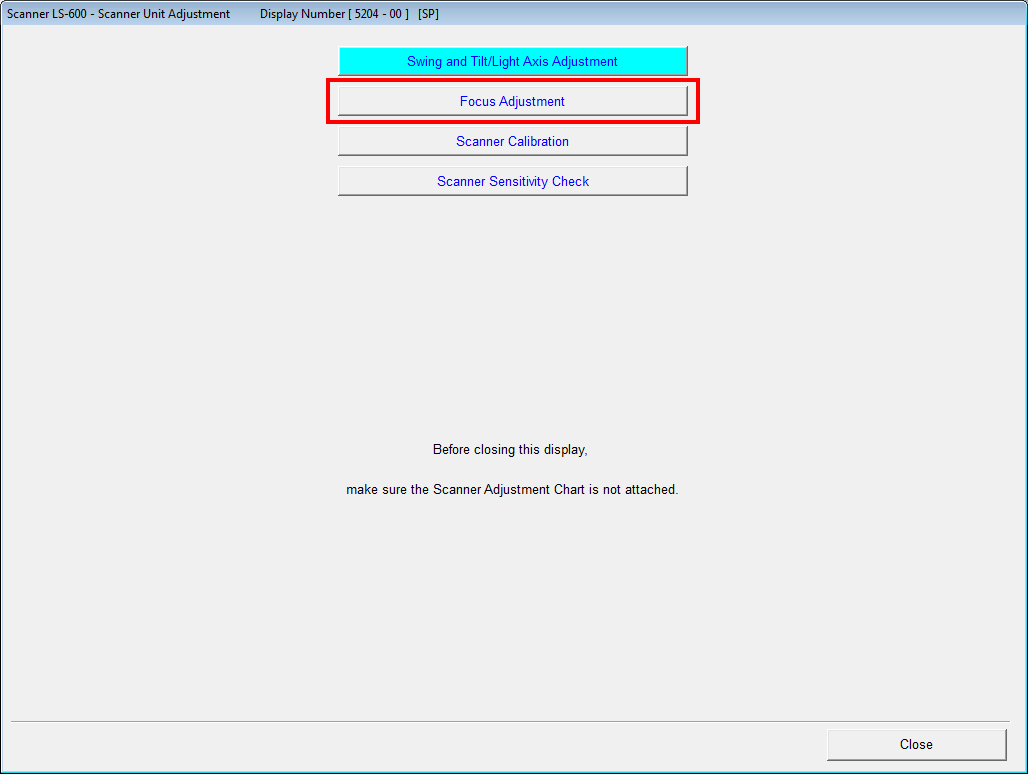
Click on “Focus Adjustment” and the following screen will appear:
Click on “Next” and the following screen will appear for a few seconds:
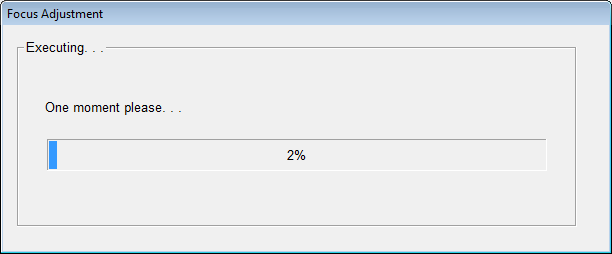
Then, the Focus Adjustment screen will appear:

Now, you have to manually change the focus value and re-scan the same film until you see the improvement you’re aiming for. Using this method, I’ve been able to fine-tune through just a couple of tries.
To make the process easier, I recommend using a high-resolution film (slide film and low ISO) and a photo with details like text that you can use to differentiate between in focus and out of focus.
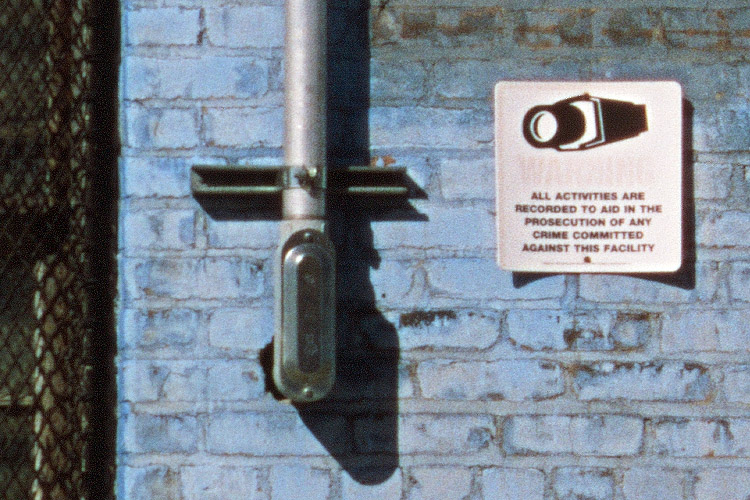
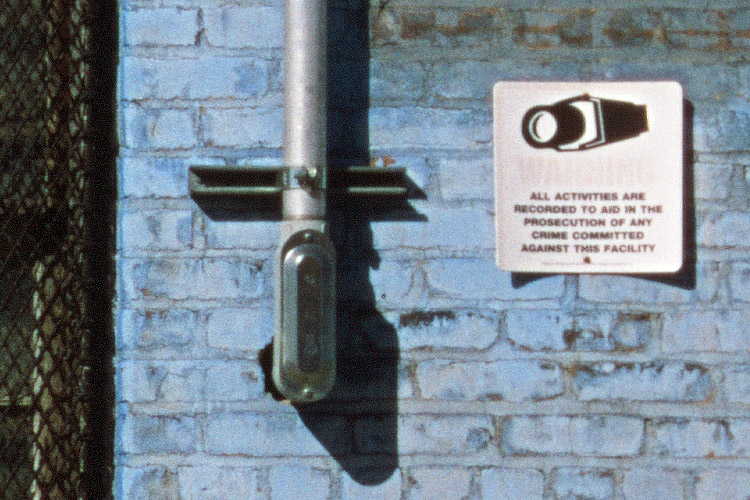
Here is the example of the focus adjustment I did with my scanner:

| Focus Value: 120 (Out of Focus) | Focus Value: 134 (In Focus) | Focus Value: 160 (Out of Focus) |
 |
 |
 |
Repair
The LS-600 is complex, with many moving parts and sensors. Spare parts are difficult to come by. As a result, it is challenging to repair. Fortunately, the scanner is still in production, so Noritsu offers (expensive) repair services.
So far, I haven’t need to repair my LS-600. If you have experiences to share, please tell us about them in the Comments.
One note – for those of you considering the Kodak F135+ as alternative, it is much easier to repair – even though you’re on your own without manufacturer support – because its design is relatively simple. I have successfully changed the film rollers on my scanner, which required entirely dismantling the scanner.
Conclusion
The Noritsu LS-600 is an excellent scanner, and we highly recommend it.
It easily and efficiently produces high-resolution scans with very good color accuracy and strong dynamic range. Scans require minimal post-processing, especially if you take the time to make adjustments during the scanning process, such as deactivating the Automatic Contrast functionality.
Because it’s bulky, you’ll need to clear your space on your desk or, if you’re like me, find a cabinet to house it between scans!
|
|
77 Comments. Leave new
cool review, one correction though, the ls-600 will do strips as small as a single negative, which is handy if you wanna break open old slides, can’t remember what my pakon used to do but I know it was at least 3 or 4 minimum, so point there noritsu
Thanks for your feedback. You are correct about being able to scan strips as small as a single negative. I’m actually looking to update the article with also additional details on alternatives for Photoshop (Picasa, Irfanview)
Damien, can you elaborate on how to scan a single frame. I know you reference above about ‘updating’ the article. But, could you share just a quick explination in a reply prior to a full article update?
I just picked up one of these scanners and it’s great. However, I’d love to scan some single frames & am currently not sure of how to go about doing so.
Thanks,
DMR
Hi David. Thanks for your comment. To scan a single frame, you just need to feed the frame into the scanner the same way you do with a strip of multiple frames. No difference. Obviously, you can not feed mounted slide frames. Is it what you were looking for? P.S. I will update the article this weekend with additional content.
Damien, that worked! I just wasn’t sure if it would pick up the single frame & also return it, or if it would necessitate opening up the scanner bay and manually extracting the single frame. The Pakon was not friendly to anything with less than 2.XX frames. I appreciate the quick response.
I am scanning with Picasa – which is both fast and easy. As for file saving, when I select ‘HIGH’, I see the ‘Input Size = 69.40 MB’. However, the final file saved is only a 4-6 MB .jpg in size. Is that consistent with your experience?
Great review!
Thanks again,
DMR
Hi David,
This is consistent with my experience. I searched for options to change the file format but without success. It seems that Picasa is saving files by default to a jpg format and with no option to change it. I’m currently testing two other softwares: IrFanView and XnView. Both or these applications are free, can save under a TIFF format and offer batch processing (no need to save manually the files). I will update the article with more details.
Thanks Damien. I have since downloaded Irfan View and as you noted below, I can now select to save the file at ~70 MB in a TIFF format. Really appreciate your review and help! I’m not on Facebook, which I know has a good Noritsu group. But, this review and your Reply comments have been very helpful. Now to rescan the 1000+ frames I’ve scanned in Picasa as ~5 MB JPEG(s) in Irfan as ~70MB TIFF(s).
DMR
Thanks for the review & comparison to the Kodak Pakon 135+! I own the Pakon, which I love and use frequently. But, the size of the scans and the DR comparison from this review pushed me over the edge to pick one of these up today. I’m looking forward to getting this up and running and will check back for alternatives to Photoshop for scanning in the future. Thanks & best regards, DMR.
Can you please provide the Windows 7/8/10 drivers? The Noritsu LS600 I have came with XP and Vista
Hi Will,
You can get the latest driver on the Noritsu Scanner Users Facebook page: https://www.facebook.com/groups/noritsuscannerusers/
What does the chroma and automatic sharpness do? I often find noritsu scans over sharpened, but otherwise great.
Based on the Operator Manual, the Chroma slider is to make colors more vivid. If the value is increased, the color becomes more vivid. If the value is decreased the color becomes duller. I always keep this slider on the default position.
The automatic sharpness is to increase or reduce the sharpness of the scan. I tried different positions for this slider without any significant difference on the sharpness. The best way to improve the sharpness is to adjust the focus of the scanner.
Hi Damien, sorry for the silly question but what do you mean exactly with System Program? I have installed the twain driver in Windows 7 (64 bit) but when I tried to import the SL600 via Photoshop CS2 I can’t get any communication with the scanner -I see the SL600 scanner main program interface but no way to launch the scan-. What do you think is the problem? The lack of the System Program?
Thanks.
Luca
What’s happen when you click on “Scan’? do you have an error message from the scanner?
I just updated the article with a list of key documents for download. The “Installation Manual” provides all details to install the TWAIN drivers and the system program.
Hi Damien,
Thanks for the documentation but I think that the problem is a bit more complicated since I’m trying to run the scanner from a MAC using a virtual machine. At the moment I’m using Windows XP as operating system since my driver and software versions are only compatible with that OS -this is why it was working with Windows 7-.
Unfortunately, it is still not working. Have you or any other user ever tried to operate the LS-600 scanner on MAC based virtual machine?
Thanks.
Luca
Sorry, I made a mistake since I meant “this is why it was NOT working with Windows 7”.
Anyone has tried to get it worked on a Mac?
See my other answer on your question. I’m using a Windows installation with Bootcamp on my mac and the scanner works perfectly. I will recommend that instead of using Windows on VM
Hi Luca.
I don’t have experience with the Virtual Machine but I know that some other people had issues with it. I will recommend that you are using the Bootcamp functionality provided by Apple to directly install Windows on your Mac. This is what I’ve done and my scanner works perfectly on my Mac.
Sorry, I made a mistake since I meant “this is why it was NOT working with Windows 7”.
Anyone has tried to get it worked on a Mac?
Thanks for the review, looks like a good option. Just a note on the Pakon, you can adjust the framing to eliminate the crop, you only need to do this once. Also the Pakon works fine run on a Mac using a virtual machine for Windows. I would also be interested in finding out if you can run the Noritsu from a VM.
Fantastic overview – thanks. I have a Fuji SP500 and have been looking at the Noritsu as it seems to do much better at B&W. Are the scans you have available for download straight out of the Noritsu or have the been tweaked in post-production? The clarity is quite stunning on all of the scans but the B&W in particular look amazing – very natural.
The scans available for download have been processed a little for the color balance and for the contrast in particular for the B&W. I can add for download the files straight out of the scanner if you want. Interesting that you have the Fuji SP500 as I’m actually looking to buy one to scan mounted slides. I already bought the film carrier for mounted slides but I have difficulties to find the scanner itself. Could you tell me where you bought your?
Hi Damien,
Would it be possible to geta copy of the images that came straight out of your Noritsu.
I’ve recently purchased an Ls-600 but I can’t seem to get my BW to look half as good as yours.
I’ve been using XnView with a copy of XP via a VM on my Mac but I still don’t think I’ve cracked it in terms of results.
Ive had mine for about 6-7 months. Im having mixed feelings about it. Mine constantly ejects the film for no reason during scanning. Might upgrade to the fuji sp3000 when I have enough money saved.
Were the scans here sharpened in any way? Or do they come out of the scanner like this?
The scans were not sharpened in any way. Some of the scan were processed a little for contrast and it may create the visual impression of better sharpness.
Hi I bought a LS600, I tried to use the XnView to scan my film, but after the manu of scan appeared, it shows “one moment please” for a long time and the scan button is black, I couldn’t scan my film, I am using the Windows 10 and I have already installed all the drivers and software, I need some help, thanks
Thanks for the comparison! I had a Pakon and now after seeing this I got a LS-600, as I use my analog work professionally as a photographer and 6mp is not enough for many customers.
I try to get access to that manual adjustment…but sadly after the automatic adjustment he will “terminate abnormlay” and leave no other options then cancel. Where to get there? what OS and drivers are you running? I have it in a virtual machine on parrallel, which works kind of, and on one in vmware, which works not so. both don’t allow me to manual adjust the scan. Can you help on this?
want to add: I tryed both XP and windows 10. which version do you use?
Hi Valentino. I’m using Windows 7 on a Mac with bootcamp
I will recommend to use Windows 7 on a PC or with bootcamp on a Mac. Some people are also using it with Windows in a Virtual Machine but it does not always work perfectly. You can get a cheap laptop with Windows 7 on it to use the scanner.
could you describe your “workaround: manually changes the focus adjustment number”?
Hi Valentino. I just updated the article with details on the focus adjustment (go down to the section about maintenance). I hope it will help you!
With regards to the Automatic Contrast, what you’ve stated is actually the reverse of what is true. When set to 10, the function is used at its maximum effect while at 0 it has no effect.
Thanks for the review, I did notice that your software shows the resolution in terms of MP while mine shows it as LOW, MID & HIGH, is yours a newer version?
Another question, is there a way to add Metadata & Notes while scanning the film?
Hello,
thank you for this great review
Well, I have a brand new LS-600 from 2010 and I need advise for the choice of a computer.
I have various option, and my wondering is about monitor calibration.
– I’m working on a Mac Pro with 2 highres Eizo screen perfectly calibrated, I work with Lightroom…
– I want the LS600 to just scan the frame the best way as possible, and then import them in Lightroom on my mac.
So what will be my best option ?
1) buy a dedicated PC (laptop or not) save the images to an HDD and then connect the HDD to my mac and …..
the problem is the screen, I will need to buy another good screen for the PC, buy I need a good graphic card….
2) Use the Mac with Bootcamp or whatever to install Windows and benefit of the screen and calibration of the mac ?
please any help will be apreciated.
regards
maybe a late reply is better than no reply.
I would suggest to use a dedicted WinPC which you connect to your home-network.
You can then access it from your Mac with Windows Remote Desktop. File transfer should also be possible.
theoretically you would either not need to calibrate at all or just use your calibration tool on the Remote Desktop Window.
Hi Damien,
Thanks for the great review!
Would it be possible to have instructions for adjusting focus posted? (Or at least the “secret code” needed, and the way to access the menu in question?)
Many thanks,
Mark
HI Mark. I’m looking to add one section to this article with all details about the manual adjustment process for the focus. I will let you know when it will be ready.
Hi Mark. I just updated the article with details on the focus adjustment (go down to the section about maintenance). I hope it will help you!
Thanks for the most thorough Noritsu review out there. I’m a brand new owner of a Noritsu, and your review addressed many of the questions I had in deciding to make the purchase.
Unfortunately, I’m getting terrible results. My scans are very blurry. But I’m glad to read that there’s a possible fix that I can do myself (I wouldn’t even know where to find a technician). I am very interested in the method for fine-tuning and the article dedicated to the topic (in fact, I’m lost without it!)
Many thanks for all.
Hi Glenn. I will try to add a section in the article to describe the process for the focus. There is a hidden menu for which I will give the details to access. I should be able to do this before the end of the weekend. I will let you know
Thanks Damien, sounds great. Since acquiring my LS-1100 recently, this page has been an invaluable reference. I don’t have Photoshop on the old PC I’m using, and XnView worked like a charm.
Hi Glenn. I just updated the article with details on the focus adjustment (go down to the section about maintenance). I hope it will help you!
Hi Damien – I followed the focus procedure you added, and it worked great. At first I was discouraged – my scanner arrived set at 111, and I tried the same settings as in the article, in the 120-140 range, but it showed no improvements at all. So I tried cranking it all the way to its upper limit of 290, and that gave me great results. I don’t know if it’s meaningful or should be of any concern that I’m at the limit with no margin for error (if that makes sense), but the bottom line is the results now look great and I can now start using my scanner. Thanks again Damien!
One unrelated question – although my test scans look good, I’m getting a message to do a cleaning with the cleaning leader. I’ll get those, but just wondering if you use them and if you find them helpful.
Thank you for your review.
Do you use the EZ controller with LS-600?
and How do you fix color in 48 bit scan?
Vin, I haven’t yet found any software that supports 48-bit scans even though the LS-600 is capable of it. Usually I accept any minor colour casts from film because I think it adds to the look but the Auto Levels or Auto Curves algorithms in Photoshop do an excellent job of neutralising casts. I’ve never seen any negative effects or banding with 8-bit/channel images. The nature of film’s grain, being naturally ‘dithered’, means you won’t ever have a problems from pushing the histogram around a little with 8-bit film scans.
I scan with EZ controller 6.7 (latest version) on Windows 10 with my LS-600 on System Program 7 (latest firmware makes the scanner twice as fast, faster than a stock LS-1100).
It can do many things that are not listed here. A few are:
-Full screen single frame judgement editing
-48bit scanning with 16bit TIF file output (138mb in size for high res).
-CCD noise reduction (no more color noise reduction in lightroom).
-Moire reduction
-Level/tone judgement editing
-Red Eye reduction
-Full image rotation/straightening control
-Rejudging*
-Change default DSA values, set DSA templates
-Change judgement ratios (c/m/y density) to smaller change values for smoother/finer adjustments
-Create judgement templates based on DX codes
-Create scan templates (24mp tif 16 bit, 6mp jpg with unique save locations and dsa values, etc).
-So much more
*EZ controller works as a full stand alone scan lab. It scans the film as RAW files and saves them to the hard drive. Until you delete said order, you can go back and “re-order” it without rescanning the film. So, if you didn’t like the judgement you can go back and rejudge. Or, if you scanned a roll in “auto” and didn’t like a frame, you can go back and manually judge the auto frame you liked.
Any more questions feel free to ask on the Noritsu Facebook group. I post a lot of screenshots and tips/tricks.
Hi Richard.
Thanks for all these details. This is an impressive list of additional features!
How much does it cost for the EZ Controller? How and where could I buy it?
As for the System Program 7, where could I download it?
EZ controller costs $2000 for the USB key and the software CD is $160. The system Program 7 upgrade costs $160. They can be purchased from Noritsu.
There’s people that use EZ Controller (labs and sometimes the key can be found used) and are lost with it, I was thinking about maybe talking to you about writing up a review/guide like how you have here for stand alone.
Hey Richard,
Maybe you will know. Im trying to figure out what the scan quality type does in the environment settings. There is a type 1 or 2.
Same question, years later. Cannot find any info on this; the Noritsu manual is barely better than useless.
Does anyone know what the temperature adjustment error is about? Ive gotten it since day one and it constantly comes up before I can scan. Thanks
Dear Damien,
thank you for the perfect review.
I just got the LS-600 and I’m making the first test scans. Everything seems to be all right, but I am disappointed with the result picture quality of scanning to 6 MP – it is obviously sharpened. The result in 24 MP scanning is perfectly fine. The Automatic Sharpness in DSA settings is “0” in both cases. No changes in XnView settings.
Do you have any idea what I’m doing wrong?
Thank you very much for your help.
Kind regards, Petr Coch
Thinking about investing in one of these. Does anybody know if it is possible to scan the entire frame of a 35mm neg? Basically where you can see the sprocket holes, dx codes and film name?
Photoshop CS2 is not free, was made available to CS/CS2 licensed owners due to problems with authorization of licenses, so that program could be reinstalled. Use without license is piracy.
Thanks for your comment. I actually checked and I confirm that Photoshop CS/CS2 is not free. I was mislead by some news websites. I also updated the article to reflect the change.
Hi Damien,
I have just received my LS-600 and this resource along with the Facebook page is brilliant! My machine came with the V5 TWAIN drivers which don’t work on Windows 10 but the V6.5 available for download via the Facebook Page do 🙂 I had some trouble with Windows installing the System Program Disc stating I did not have the correct privileges to move a file & had to re-install Windows 10 but all is working fine now with Irfanview.
Thank you so much for this article – it is really helpful; can you confirm that with the Automatic Contrast 0 is Off and 10 is full On?
Thanks again,
Fraser
Hi Fraser. Thanks for your feedback. I’m sure you will enjoy your new scanner! As for the automatic contrast, the more you move the slider to 10, the more it will recover highlights. I will update my article as it was probably confusing.
Hi Damien,
Do you have any experience with any other film scanners at lower price tiers that can provide similar image quality?
Work-speed is not essential to me so I am wondering if I can get similar results with say, a flatbed or something else clunky a fraction of the price.
There are some films scanners available from Plustek like the OpticFilm 8200i. You can get a brand new one for around USD 350. It’s less expensive than the LS-600. It’s also much, much slower. Also, based on my experience, I’ve never had good results in terms of colors.
Another option is to use a DSLR with a macro lens. It’s slower than the LS-600 but the results can be very good and comparable to the LS-600. I’m looking to publish a side by side scan comparison very soon.
I use a Nikon Coolscan 4000 that does a great job with 35mm slides, strips (with SA-21 or FH-3), individual negatives (with FH-3 or equivalent holder) and full rolls (with SA-30). I found a serviced model for under $500 with the mentioned adapters. It has ICE to hide scratches and dust, which works very well. It scans at 4,000 x 4,000 ppi and I have no problems with jams or connectivity. Nikon made an adapter for the Coolscan that was guaranteed to break after 10-30 rolls, so there are no functional ones available on the market – if a person wanted to risk it.
Ironically, I was looking for something to scan my 125 rolls of APS film, which is why I ended up here. Unfortunately, enough people discovered the LS-600 that they are now rare and at a premium ($2,400+). I would love to find one of these for under $1,000.
Thank you for this review, I was wondering if there was a way to turn digitial ice on/off through xnview as I never saw the option through the pictured menus.
Oh man I’d love to have a Noritsu further on down the road, but right now I have the Pakon F335 and is enough for my needs. The Noritsu’s greater resolution has always called to me, but I had no idea that scanning a roll of film would take half an hour for one roll! That doesn’t excite me, when the F335 can do it in 3-4mins…
where on earth did you find the f335!? I have been looking for almost a year. The only one I can find on all of ebay is in germany right now and its 3500 euros.
Richard,
There were at least 3 available over a longer period until December 2018. (2 from the UK, 1 from Poland)
As I was looking for a LS-600 since September I purchased one of the UK F335s.
(Sadly didn’t have the funds for the Noritsu back when they were available trough AAA)
However, I finally found a LS-600 which i will pick up early February. Where are you based?
Maybe I’ll sell my F-335.
(However, it’s so super fast and I’m so impressed with the results that I’m not 100% sure yet. Need to compare it against the Noritsu)
Best regards
Richard,
I already replied yesterday, but my comment has not yet appeared. I’m trying again.
Where are you based?
at least in December there 3x F-335 available on the bay for around 1800-1900€.
I was looking for a LS-600 since September and as the Noritsu was not available in Europe or the prices just were insane (like 3500€ without EZ-Controller and the Dongle) I purchased one of the F-335s.
I’m super impressed by the speed and the convenience TLX & PSI (the scan software) offers.
However, I found a LS-600 in my town for a price I’m willing to pay.
So maybe there’s a chance that one of both will become available in Germany in Late February / March.
I need to have a look at the Noritsu and compare it to the F-335 (especially for speed, results and convenience) and then make my decision which to keep. If I find a decently priced USB-Dongle for EZ-Controller and can purchase the newest Version I guess that the Noritsu will be fast enough and the F-335 can be sold.
I suggest you keep an eye open to the Pakon 135 and Noritsu User Group on Facebook.
You could also post there and I’ll contact you.
best regards
Phil
I was extremely fortunate, I got mine almost 4 years ago now, there was a government auction site that was selling a dozen of them from some facility in Oregon. I suppose that if I had been really thinking ahead I would have bought them all and sold them off when the price really started going up. Some people I think did buy a few and sold them on the ‘bay, I think for around $1200, though they would have bought them for no more than $250+s/h. I bought two so I have a main unit and a backup in case anything happens. While I wouldn’t say that the max resolution of 2100dpi gives me truly all I’ll ever need, I’m still pretty much set for life. They’re nice scanners but I don’t think I’d buy one for $2000-3500!
Brilliant write up! Just had my LS600 arrive today, and with help from AAA Imaging and this review I had it set up, focus calibrated and scanning within an hour. The difference between this and my V700 is chalk and cheese, and it is another step above the Frontier scans I’ve been getting from my lab. When you consider the $$$ we’re investing in good cameras, lenses and film it just makes sense to get the best scans we can afford.
This scanner is now 4500 dollars, what is going on
Where did you see the scanner at this price?
https://www.ebay.ca/itm/Used-Noritsu-135-film-scanner-LS-600-with-Computer-host-stand-alone-for-QSS35/113507695619?hash=item1a6d95fc03:g:oxgAAOSwlkpcKeUR:rk:1:pf:0
Ebay. There right now, just google (I don’t think I can post a link). Its the only one that shows up. There is an s1-ii (?) which is much less, but what are those?
I know ebay is not the best but when there is only the buy it now option and no where else to find them, that is the price. AAA imaging does not have any more nor do they expect to again and the last one they sold recently was for 1800USD apparently. I just asked them this last week. Just a few years ago there were tons of these and then all of a sudden just like that they were all gone..
I appreciate articles like this, but frankly they just drive up the price by an order of magnitude, same issue in the used camera market. I think pros buy one and a few backups just in case, and I always hate that when I read it. If you want people to really use film, take the risk and release your backups. If yours breaks, just fix it like everyone else. Its not like anyone is making any more of these anytime soon.
Honestly we need a Pakon/noritsu/fuji scanner co-op sharing network where a group of people in each city get together and buy one together and share it. Film photo clubs.
I encourage anyone who own multiple multiple backups of these amazing scanners to put them to good use and share them like this rather than let them sit for the one rainy day 5 years from now where you might need it, or charge people ridiculously money to scan 36 frames when there is really is only one good one. Something needs to change in the film market to break down this scanning barrier.
[…] http://www.gostreetphoto.com/noritsu-ls-600-film-scanner-review/ […]
Hi everyone,
Just received a S-600. Game changing for me as film documentary photographer. I’ve one question about d-ice option. If i use Twain driver and XnView do i need Noritsu D-Ice plugin to “activate” this d-ice option for scanning ?
Thanks in advance
Nico
You need to activate the Digital ICE feature under the Scanner Environment Display. You can find details in the section 3.1 of the User Manual
https://www.gostreetphoto.com/wp-content/uploads/NORITSU-OPERATOR-MANUAL-APRIL-2007.pdf
Thanks Damien
I have received my S-600. Everything is installed correctly. However, a small issue has come up…
I keep getting the error message “close the scanner unit cover” even though it is properly closed. Is this a common problem, and is there a way to fix it? Thank you in advance to everyone.